
Back to top
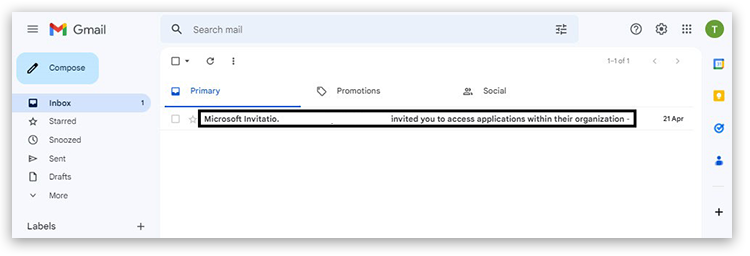
1. You will receive an invitation from 'Microsoft Invitations on behalf of Pearson PLC' to register for multi-factor authentication.
To complete the guest account registration process, you must first click to open the email:
2. Click on the 'Accept invitation' button in the invite email to continue:
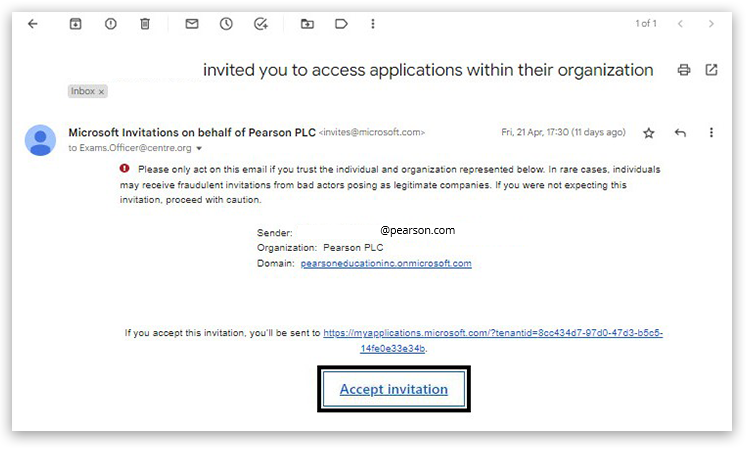
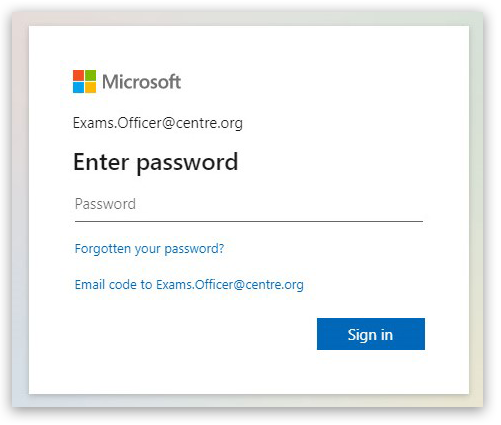
You will be presented with this sign in screen if your email address is registered but is not currently logged into a Microsoft service. Enter your usual email password to sign in.
Please note: If your invitation email is sent to an existing Outlook email account and you are logged into a Microsoft Service, you may not be prompted to sign in again. If not prompted to sign in here, please go to step 9:
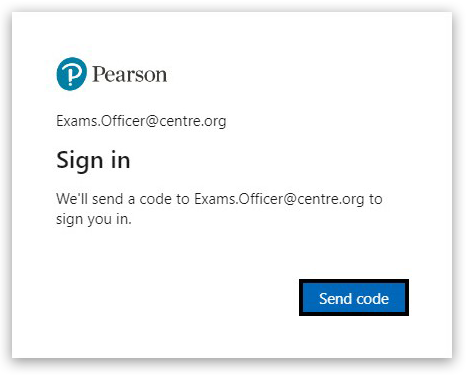
3. If your email address is not registered with Microsoft, you will be presented with this Sign in screen. Click on the 'Send code' button to send a code to your registered email address:
4. You will then need to return to your email inbox to access your verification code:
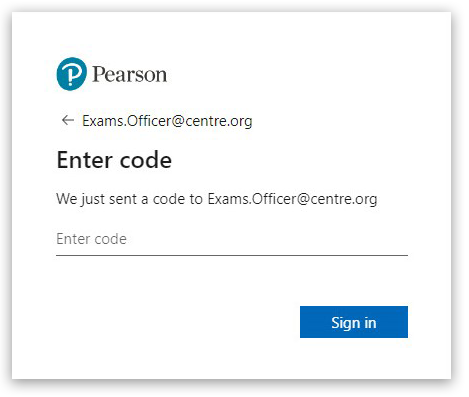
5. After you click the Send code button, you will receive an email from the sender 'Pearson PLC (via Microsoft)'.
Click to open the email:
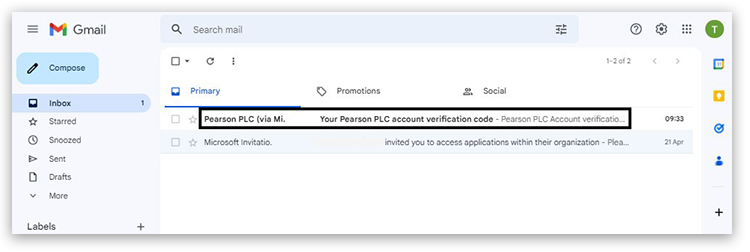
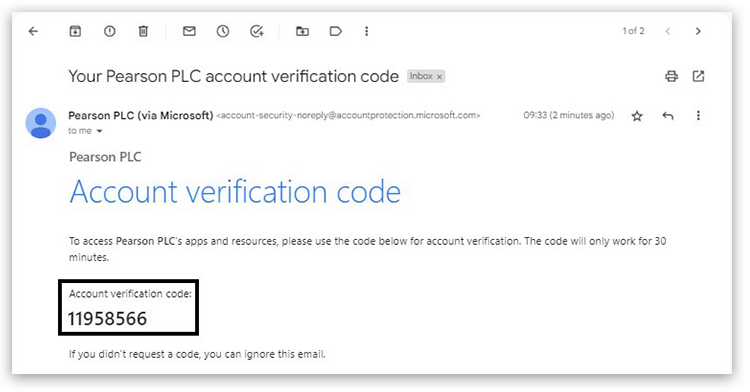
6. Copy the 8-digit code in the email to your clipboard.
Please note: The code will only work for 30 minutes:
7. You must then return to the previous window to enter the code.
8. Click on the box, enter the code you received and click on the 'Sign in' button:
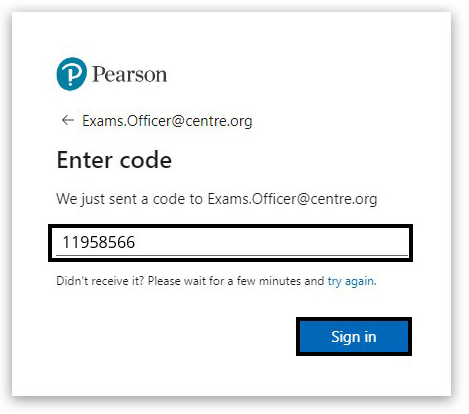
Please note: The code used above is an example.
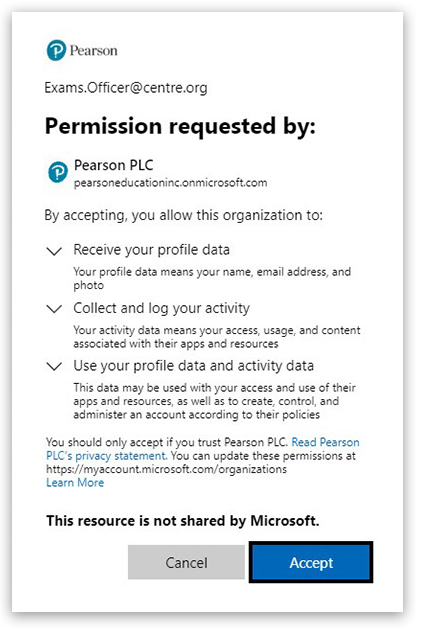
9. You will then be able to review the permissions and Pearson’s privacy statement.
You must click on the 'Accept' button to accept the use of your information to continue:
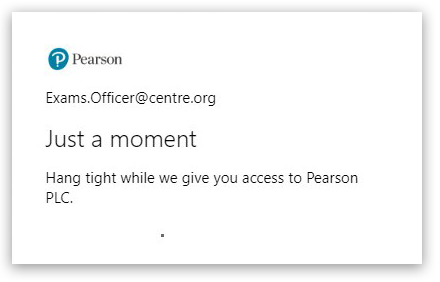
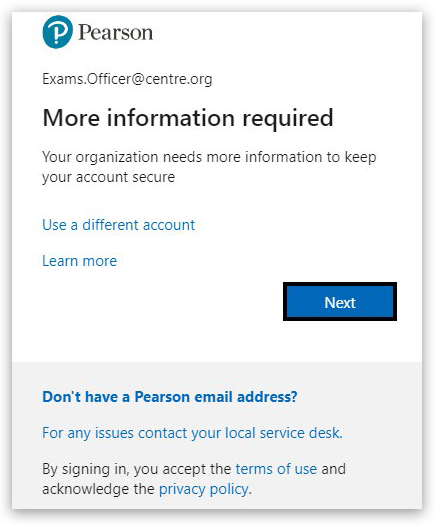
10. You will be prompted to set up multifactor authentication to keep your account secure. Click on the 'Next' button in the browser to continue:
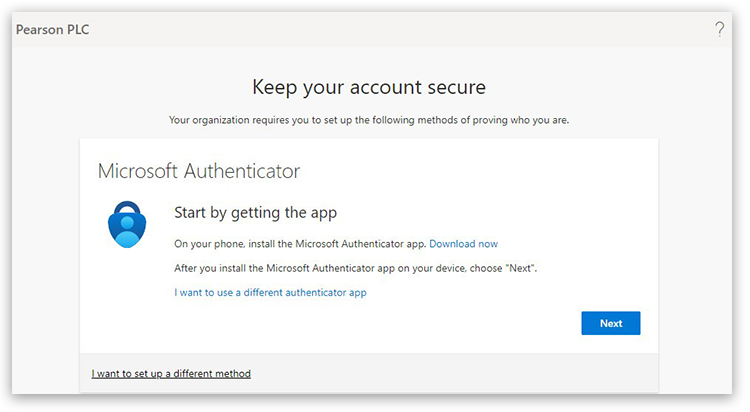
11. We encourage you to use the Microsoft Authenticator app rather than selecting a different authenticator app or choosing a different method.
The only different methods to the Authenticator app to be used are:
- Proving your identity via a call on your phone (mobile number or landline number allowed)
- Texting a code to your phone
Please note: With the phone call option, this must be a direct number, so if you are only contactable through an extension/switchboard, please use the text message option.
To set this different method please see the Instructions for setting up a different method.
12. If you are using the Microsoft Authenticator app method, click 'Next':
Please note: If you have previously set up the Microsoft Authenticator app on your device, see the instructions from step 18.
13. On your mobile device, navigate to the App Store (iOS device) or Play Store (Android device) and search for Microsoft Authenticator.
14. Download the app on your chosen device:
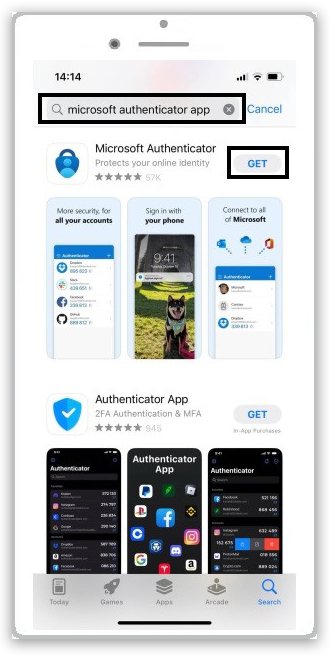
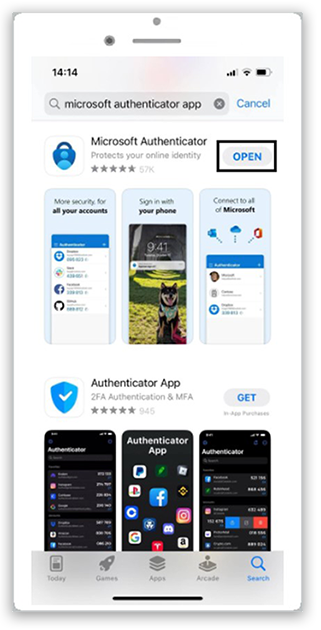
15. Once downloaded, click 'Open' to open the Microsoft Authenticator on your device:
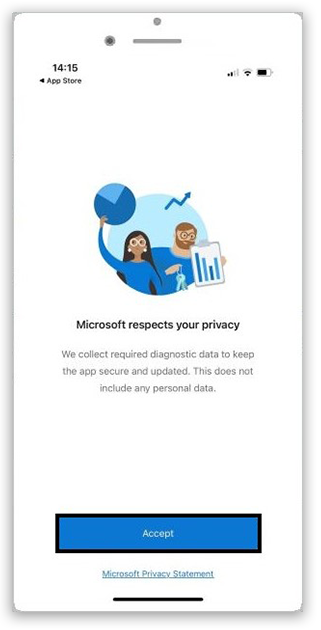
16. In the Microsoft Authenticator app on your device, click 'Accept' to accept the privacy statement:
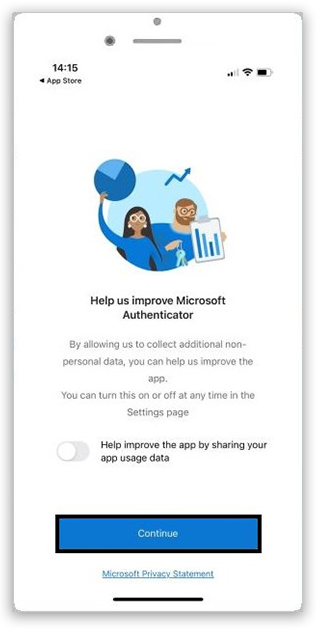
17. Click 'Continue':
18. Once the Microsoft Authenticator app has been downloaded and opened on your device, go back to the browser, and click the 'Next' button:
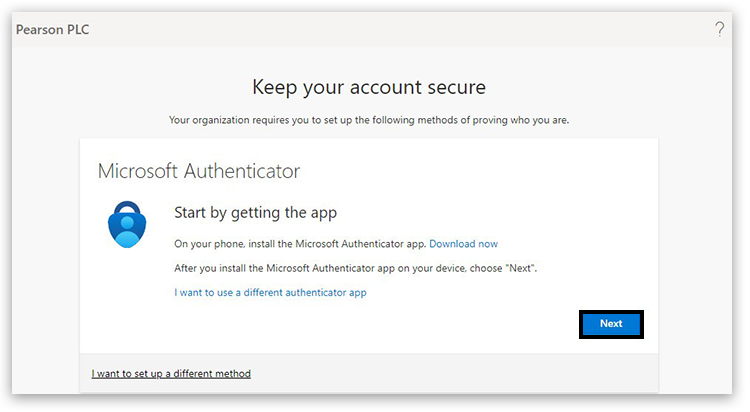
19. Click 'Next' to continue setting up your account:
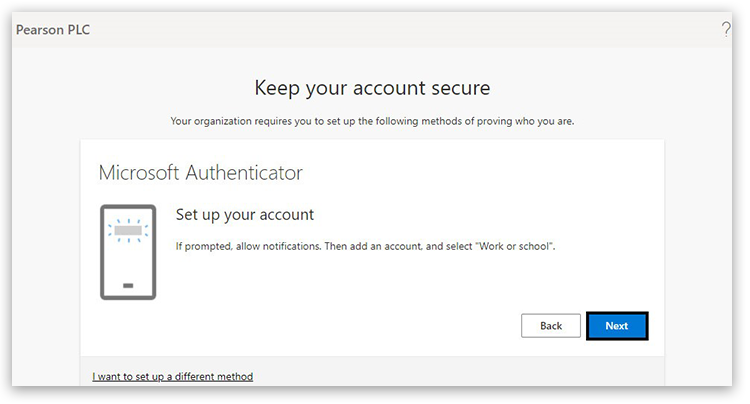
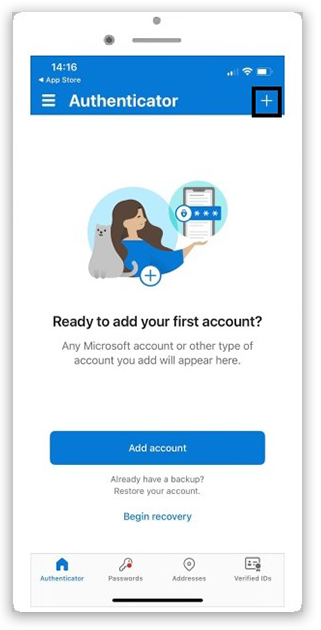
20. You then need to switch from your browser to the MS Authenticator app.
On your device, select the '+' icon in the top right corner of the app:
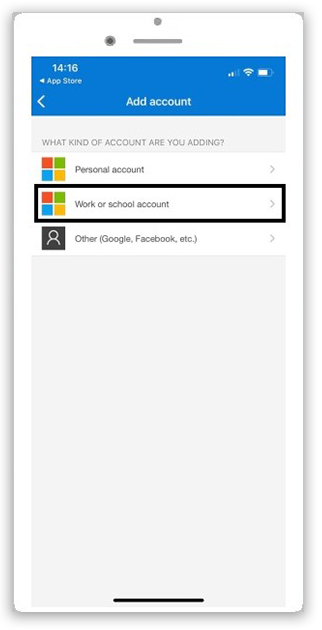
21. Select 'Work or school account' from the options:
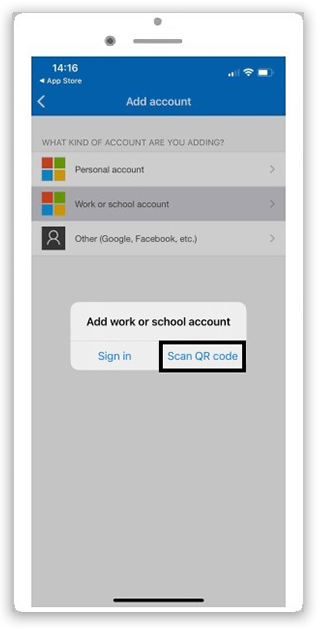
22. A popup will display on your mobile device. Select 'Scan QR code':
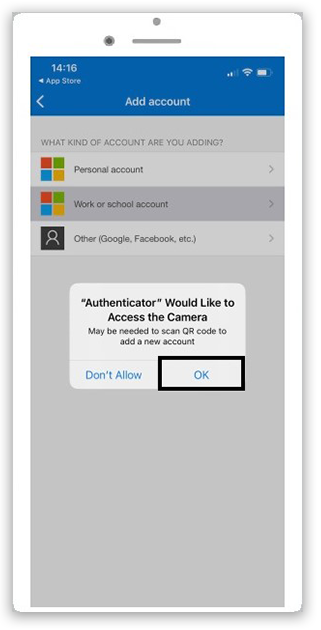
23. Click 'OK' to give Microsoft Authenticator access to your mobile device camera:
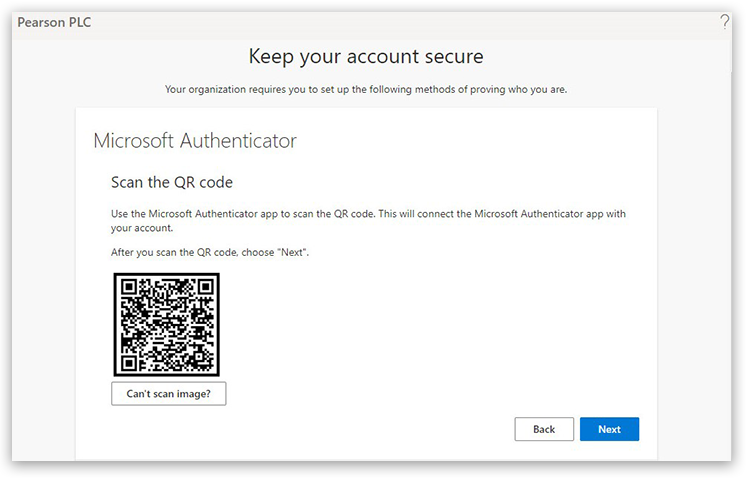
24. You then need to switch back to the browser to scan the QR code:
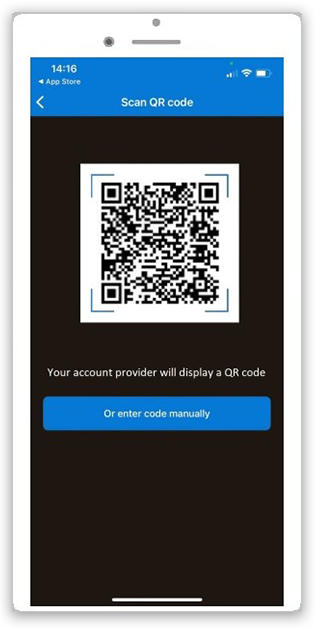
25. Point the device’s camera at the QR code in the browser on your screen:
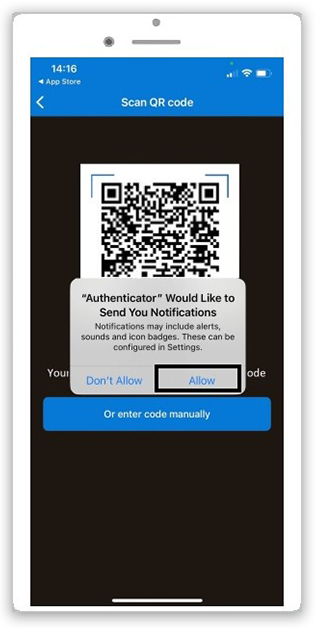
26. On your device, press 'Allow' so that the Authenticator can send you notifications:
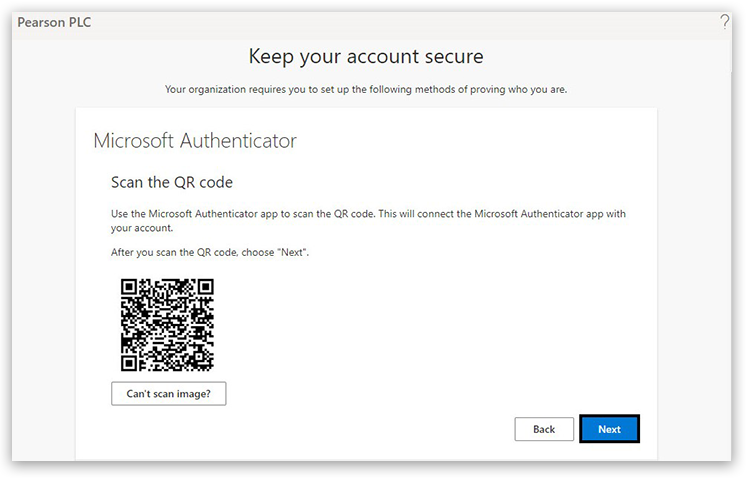
27. Back on your computer, press 'Next', and it will send a notification to the app on your mobile device:
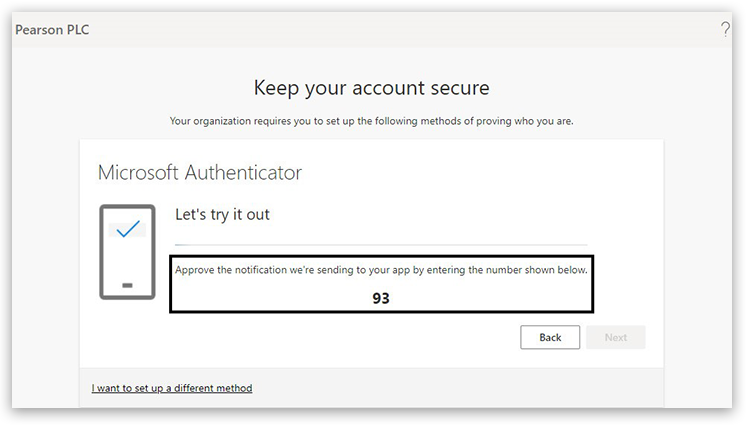
28. An approval code will be displayed in your browser:
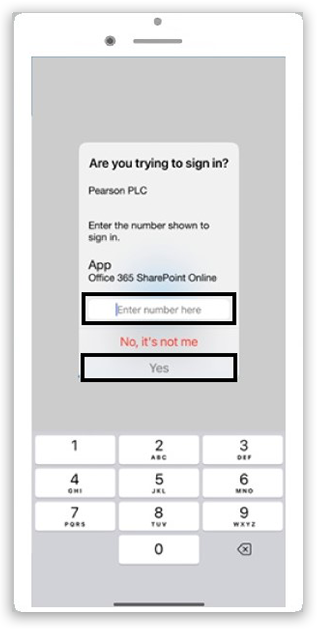
29. Approve the notification on your app by entering the number shown on the browser, then press 'Yes':
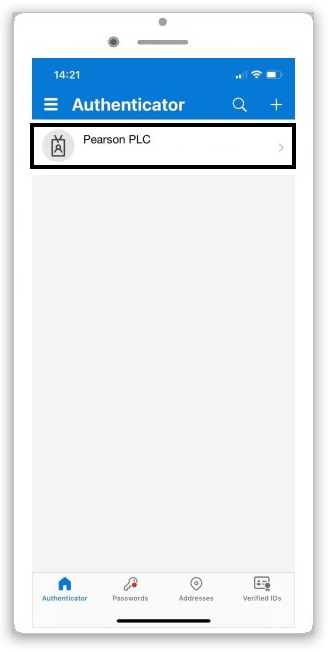
30. After you have completed the previous steps, you will then see that the account has been added to the Authenticator app on your device:
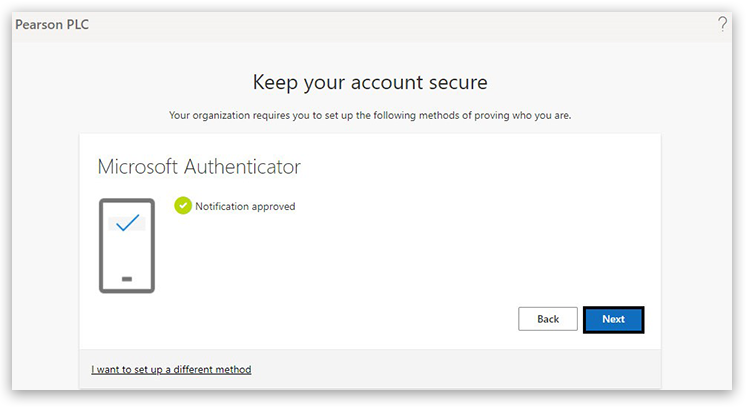
31. Back on your computer, in the browser, press 'Next' on the ‘Notification approved’ screen:
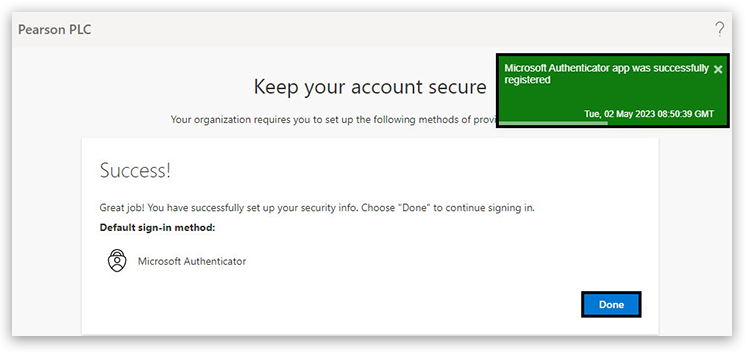
32. A brief message states, 'Microsoft Authenticator app was successfully registered'.
You have successfully set up the Microsoft Authenticator as your default sign-in method for accessing your SharePoint folder. Click on the 'Done' button to continue:
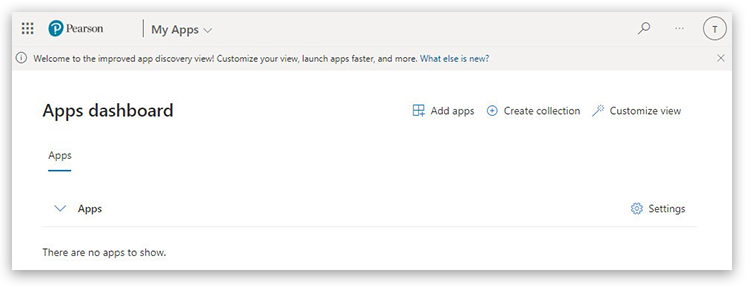
33. You will then be redirected to your Pearson account dashboard; you can ignore this page:
34. To sign out of the dashboard, click on the circle in the top right of the screen, then select 'Sign out':
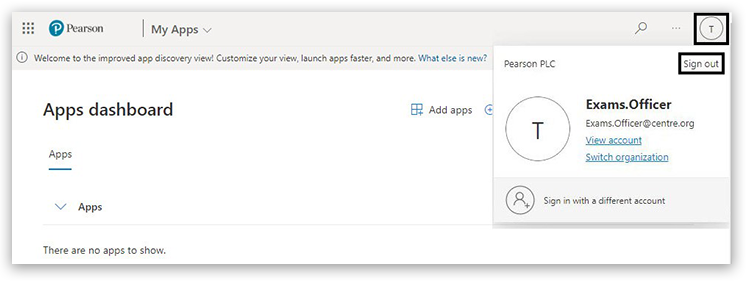
35. Once you have reached the Apps dashboard, this confirms you have correctly set up MFA. You can now return to the SharePoint link previously sent to you.
For instructions on accessing your folders, please see: Accessing SharePoint Folders With Multi-Factor Authentication (MFA).
Back to top
1. After step 10, if you want to set up a different method for proving your identity, Click on 'I want to set up a different method'.
Please note:
- The only different methods to the Authenticator app to be used are:
- Proving your identity via a call on your phone (mobile number or landline number allowed)
- Texting a code to your phone
- With the phone call option, this must be a direct number, so if you are only contactable through an extension/switchboard, please use the text message option.
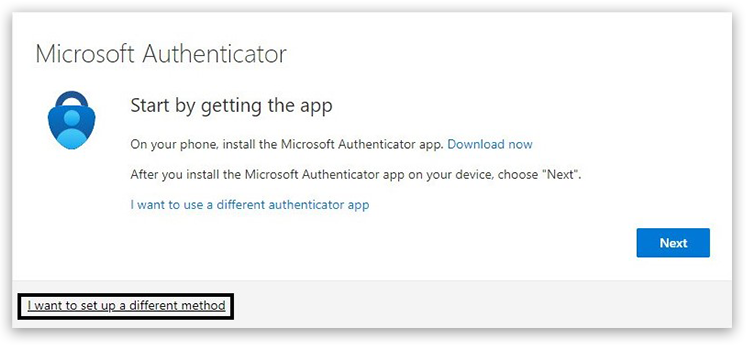
2. Click on the 'Choose a method' drop-down:
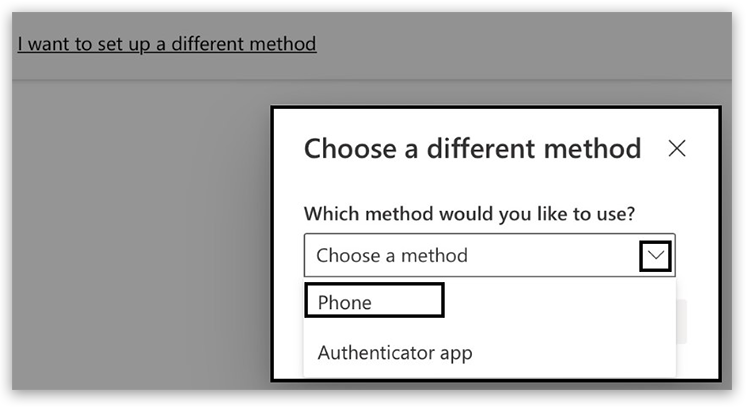
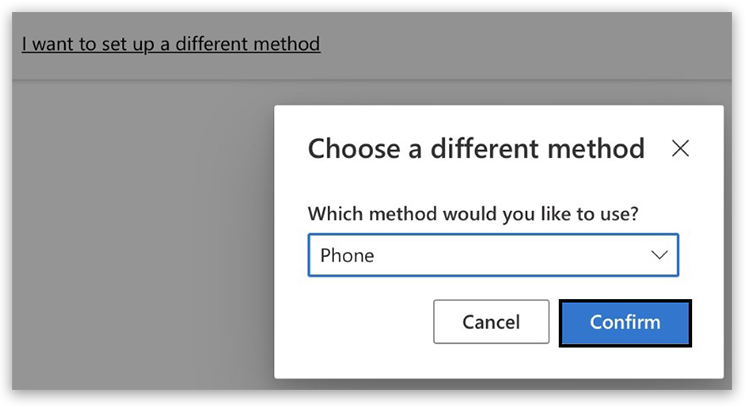
3. Select the 'Phone' option. Then click 'Confirm':
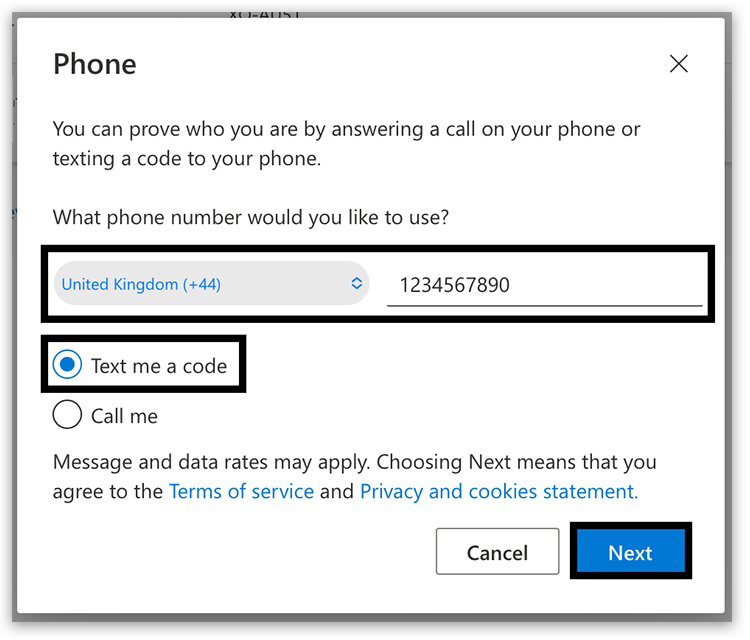
4. Switch to the correct country code, then enter your number. Make sure you remove the first 0 from the start of the number.
5. Select the preferred contact option, 'Text me a code' or 'Call me'.
6. Click 'Next':
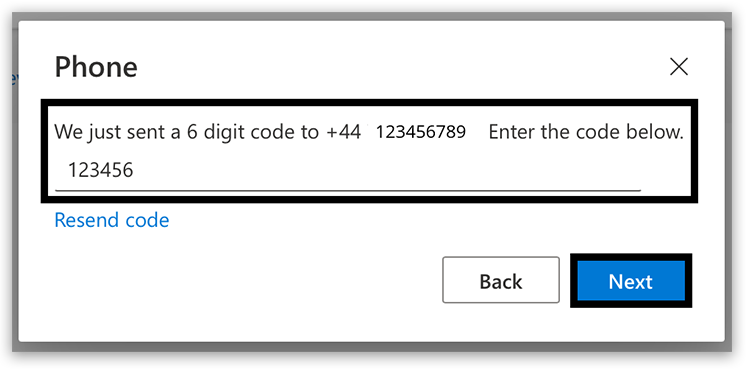
7. Follow the onscreen instructions; the example below used the 'Text me a code' option, enter the code, then click 'Next':
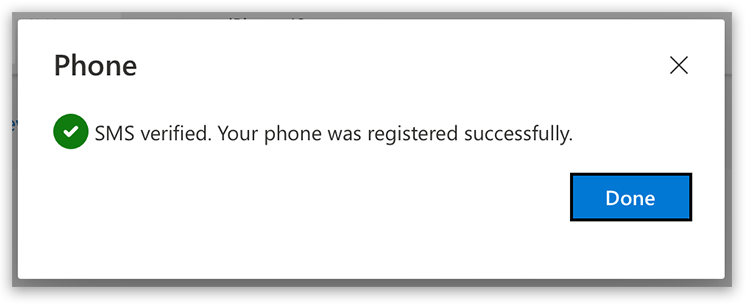
8. A confirmation message will appear; click 'Done':
9. You will then be redirected to your Pearson account dashboard; you can ignore this page:

10. To sign out of the dashboard, click on the circle in the top right of the screen, then select 'Sign out':

Back to top
Related Articles:


