Salesforce

Pearson Support Portal (Students & Parents): Creating A Case Record

« Go Back

Information

 
TitlePearson Support Portal (Students & Parents): Creating A Case Record
URL NamePearson-Support-Portal-Students-Parents-Creating-A-Case-Record
Issue
How do I create a Pearson Support Portal case record?
FAQ

PSP_create_case.png

1. On the Pearson Support Portal, if you are not already signed in, click on the 'Sign In' link at the top right of the screen:
PQ_CSP_create_account_01.png 
2. If you already have login details, you can use those. If you haven't already created an account on the Pearson Community Portal, please follow the Pearson Support Portal: Creating An Account guidance:
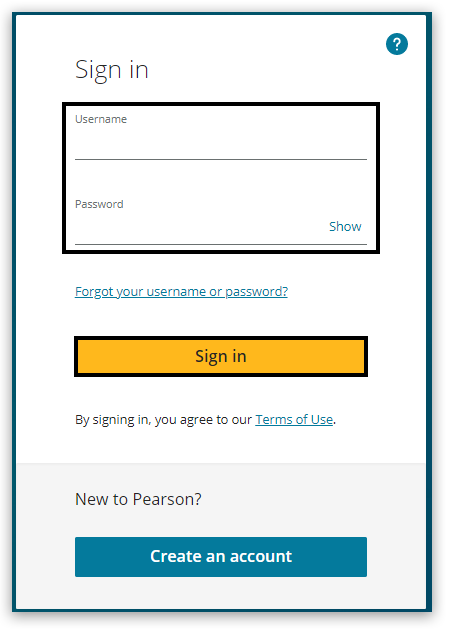
login1 420 px ds copy.png
3. Click on the 'Contact Us' drop-down at the top of the screen and select the relevant department:
PQ_CSP_create_record_01.png
Please note: If you are unable to see the Contact Us option, select the 'More' option and then select 'Contact Us':
PQ_CSP_create_record_03.png 

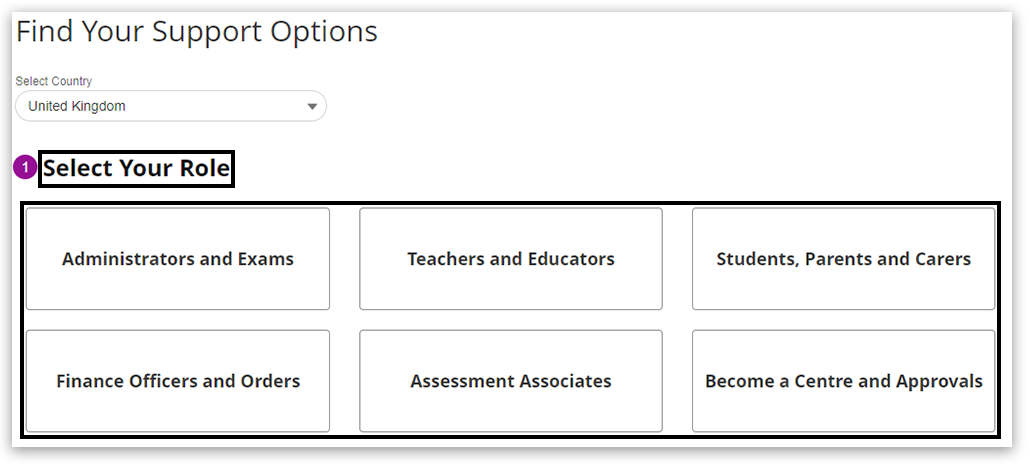
4. If you do not have your role defined in your account profile, Step 1 will require you to 'Select Your Role'. This will be pre-populated for users who have defined this attribute in their profile:
PQ_CSP_create_record_04.png

5. For Step 2, 'Select Your Support type'. These options will be specific to the option selected in the previous step. If you need to change your previous selections, select the 'Edit' button and move back to Step 1.
PQ_CSP_create_record_05.png  

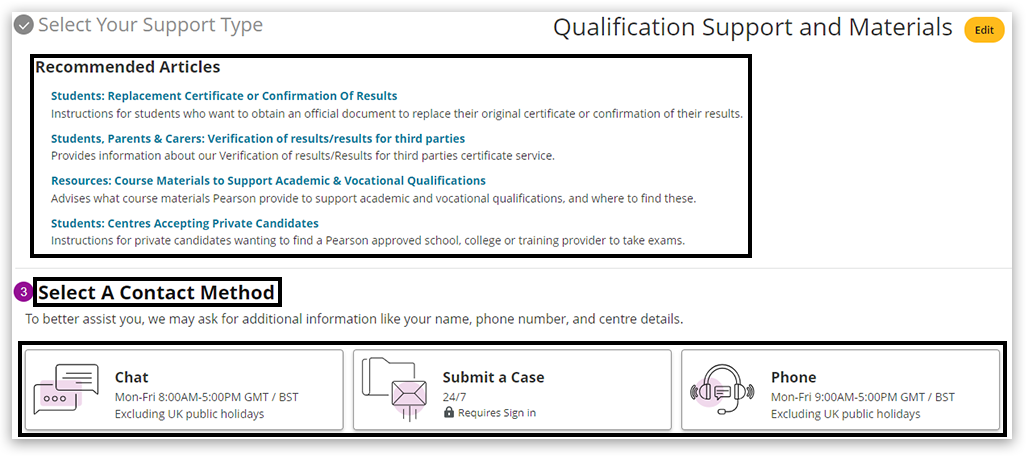
6. You will be presented with 'Recommended Articles' that may contain a process or a solution you are looking for. These may change from time to time to follow the nature of the academic calendar. Clicking on one of these article links will open the content in a new window/tab, so if the content doesn't suit your query, you can return to the previous screen by closing the additional tab/window.

If none of the articles are suitable to your query, then you can 'Select A Contact Method' from the presented options:
PQ_CSP_create_record_06.png  

Please select from the options below to proceed with the guidance:


Chat

1. If you selected 'Chat', click the 'Continue to Chat' button:
PQ_CSP_create_record_07.png  
2. Click 'Close' to remove the Privacy Notice, complete the required fields indicated with an asterisk (*) and tick 'I accept' to acknowledge the Privacy Notice. Once completed, click 'Start Chatting' to be connected to a live agent:
PQ_CSP_create_record_08.png 


Submit a Case

1. If you selected 'Submit a Case', click the 'Continue to Submit a Case' button:
PQ_CSP_create_record_09.png  

Please note: The next step requires you to be 'signed in'. You will be prompted to sign in if you have not signed in yet:
PQ_CSP_create_record_10.png 

2. Your Name and Email will be pre-populated from your account profile. If these are incorrect, please let us know when you complete your case description so we can update your profile accordingly:
PQ_CSP_create_record_11.png 

3. Select your Customer Type. A secondary field will appear, 'Request Type', asking you to select from a range of topics:
PQ_CSP_create_record_12_b.png  

4. Complete the 'Subject' field and add the details of your query to the 'Description' field:
PQ_CSP_create_record_12_c.png  
Please note: You can use the marks in the lower right corner of the box to enlarge the space by clicking with your mouse, holding and dragging the edge of the frame:
PQ_CSP_create_record_12_a.png 

5. Once you have completed the required fields indicated with an asterisk (*), click the 'Submit' button to submit your case:
PQ_CSP_create_record_12_d.png 


Phone

If you selected 'Phone', you will be presented with the telephone number appropriate to your customer type/role:


Back to Pearson Support Portal: Getting Started index page.

Detailed Instructions

Not Applicable.


Powered by