This guide explains how to access SharePoint folders that have been shared with you by Pearson employees. The process differs depending on whether you've already registered for a guest account with multi-factor authentication (MFA) enabled.
Click on the relevant title to see detailed instructions:
For users already registered with a guest account and MFA setup
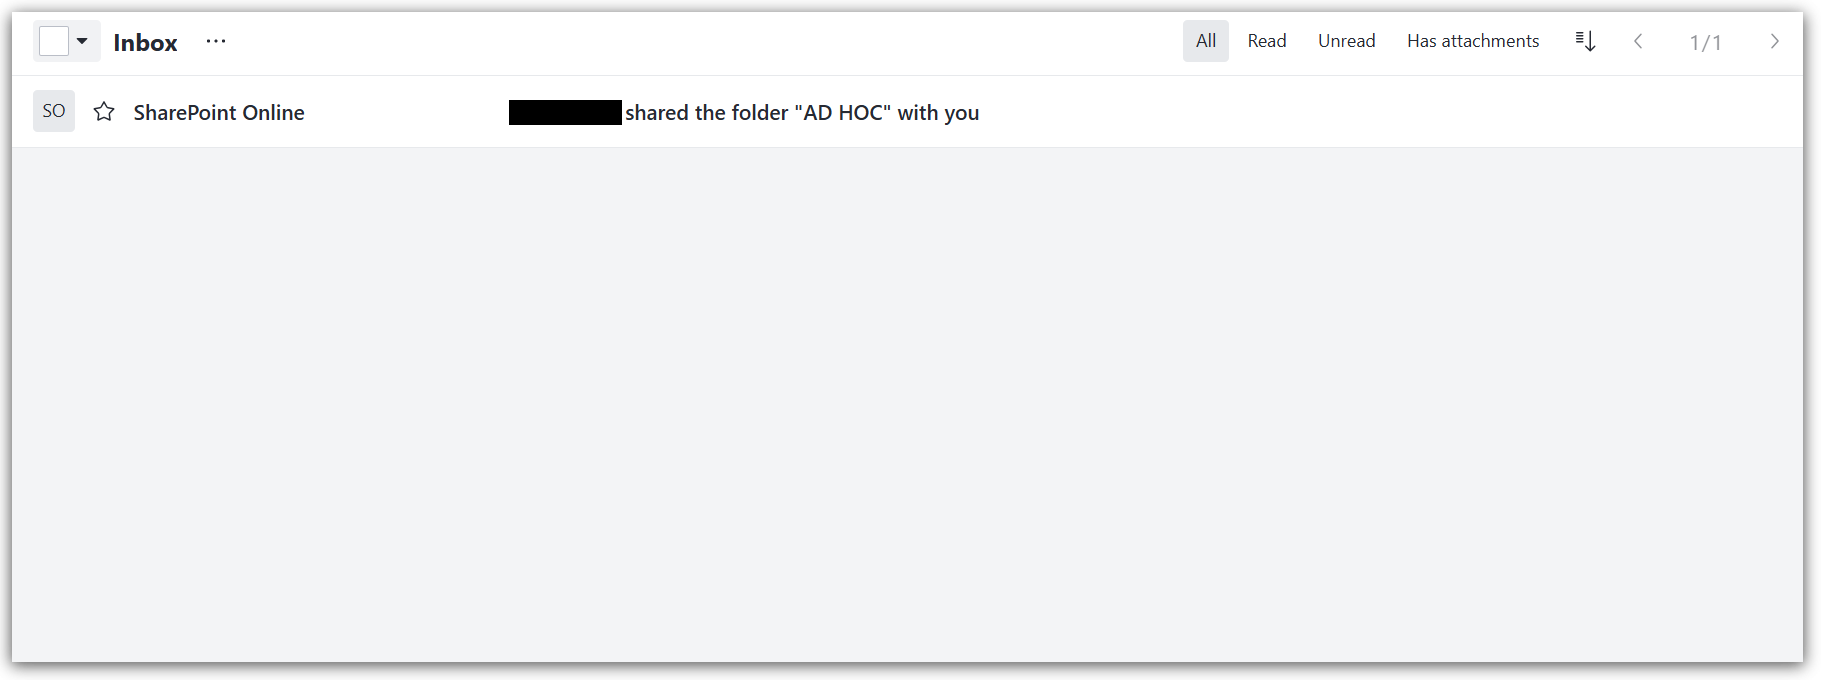
You will receive an email from no-reply@sharepointonline.com with the subject line advising that a folder has been shared with you. The subject and email content will show the name of the Pearson employee who shared the folder with you:
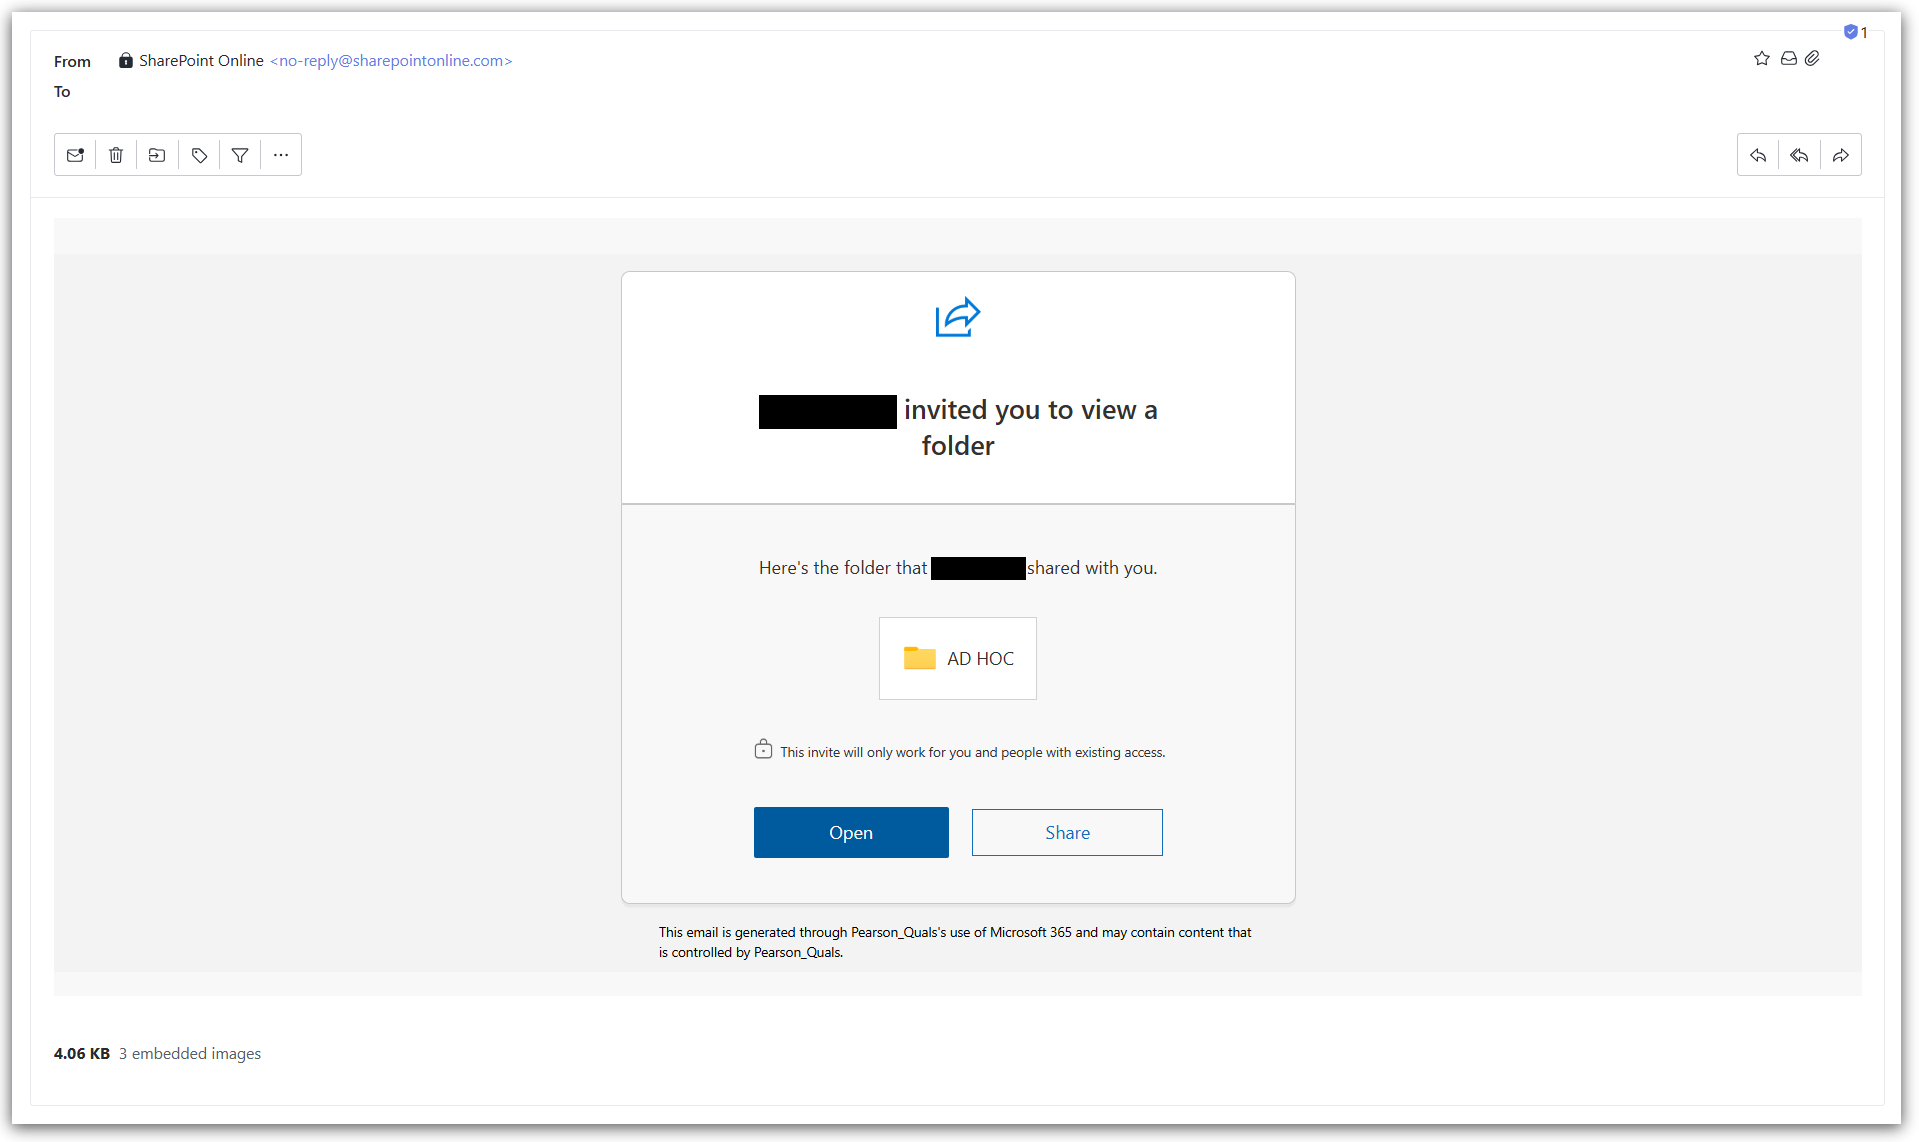
- Open the email and then click on the 'Open' link located in the email body:
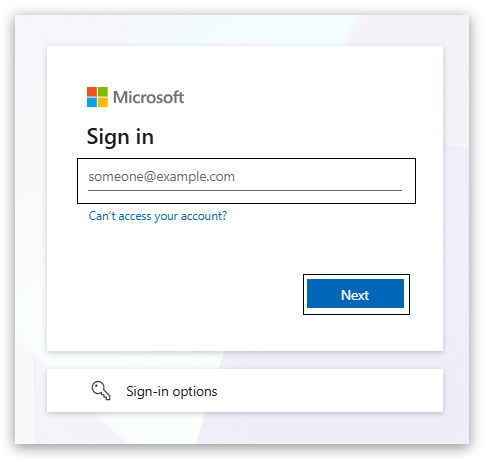
- You will be prompted to provide your guest account email address in the sign-in field at the centre of the page, and then click the 'Next' button (located below the email field) to proceed:
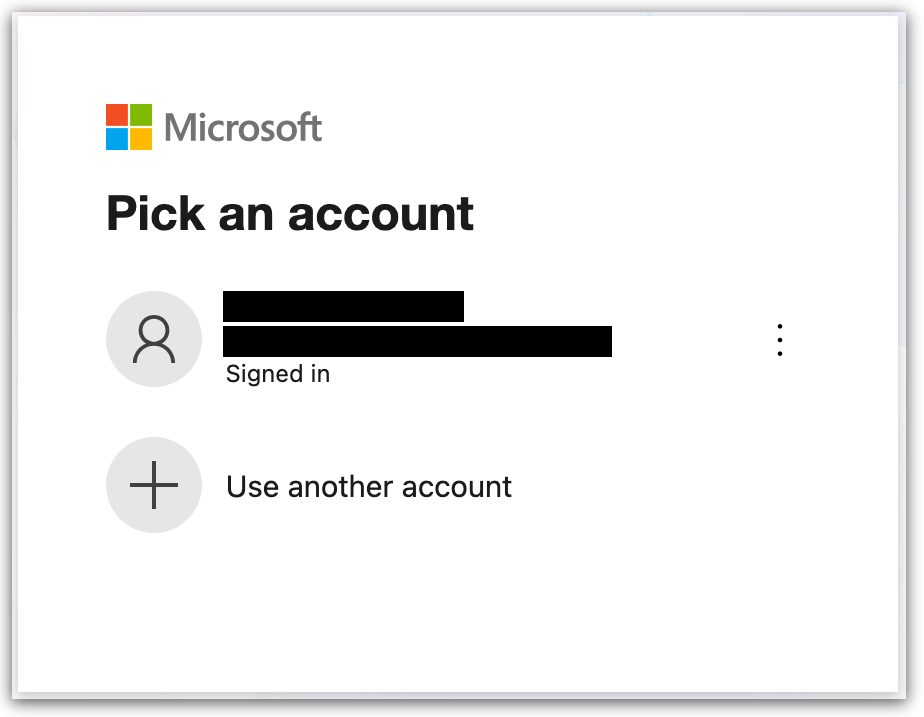
If you have already used this account with Microsoft online services, you may instead be asked to pick the account from a list of available accounts.
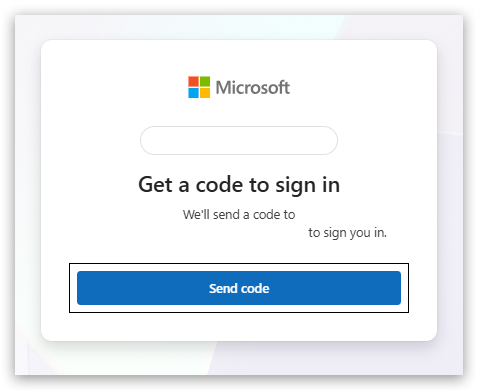
- You will be taken to a page that will prompt you to sign in via code. Click the 'Send code' button (located in the centre of the page) to request a single-use code via email:
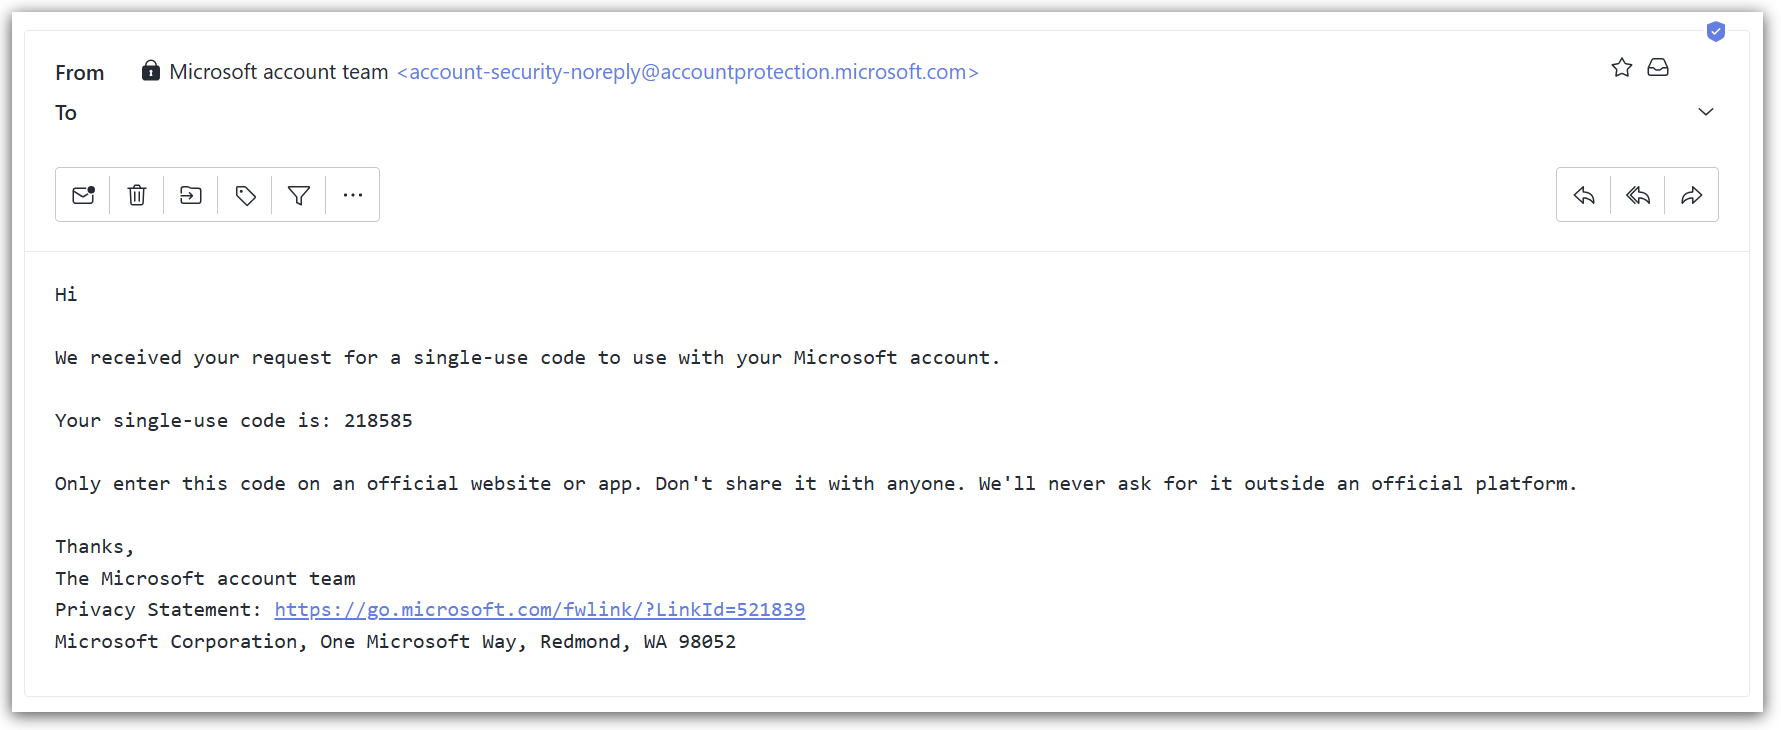
You will receive an email from account-security-noreply@accountprotection.microsoft.com with the subject 'Your single-use code' that needs to be typed into the verification field. An example of the email can be found below:
-
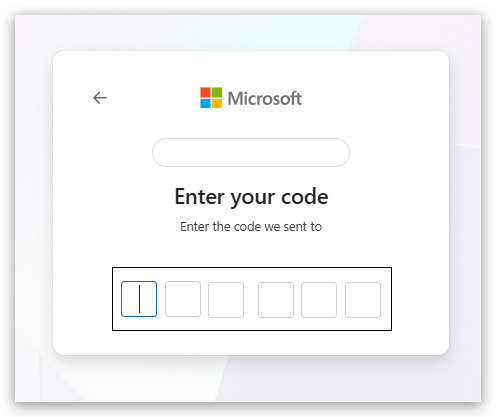
Go back to the page, enter the code:
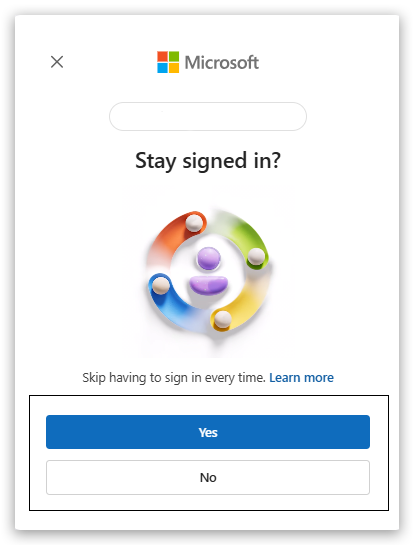
- You will be asked if you would like to stay signed in. Please select the option that best suits you using the 'Yes' or 'No' buttons located in the centre of the page:
- You will then be asked to approve your sign-in request via multi-factor authentication (MFA). Instructions will appear on-screen with a number to enter in your authenticator app:
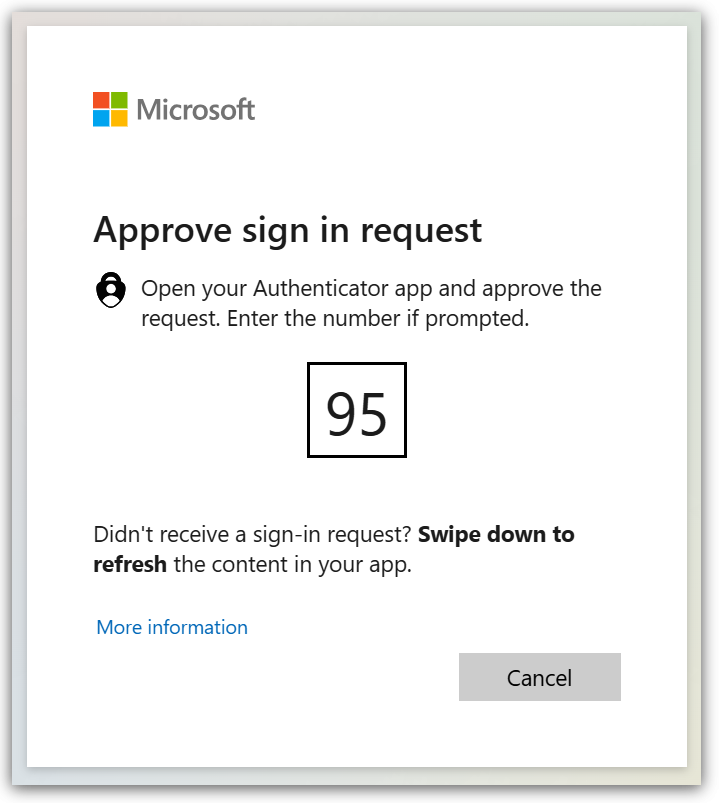
- Open the Microsoft Authenticator app on your smart device, enter the number shown in your browser into the relevant field in the app, and then select the 'YES' option to approve the sign-in:
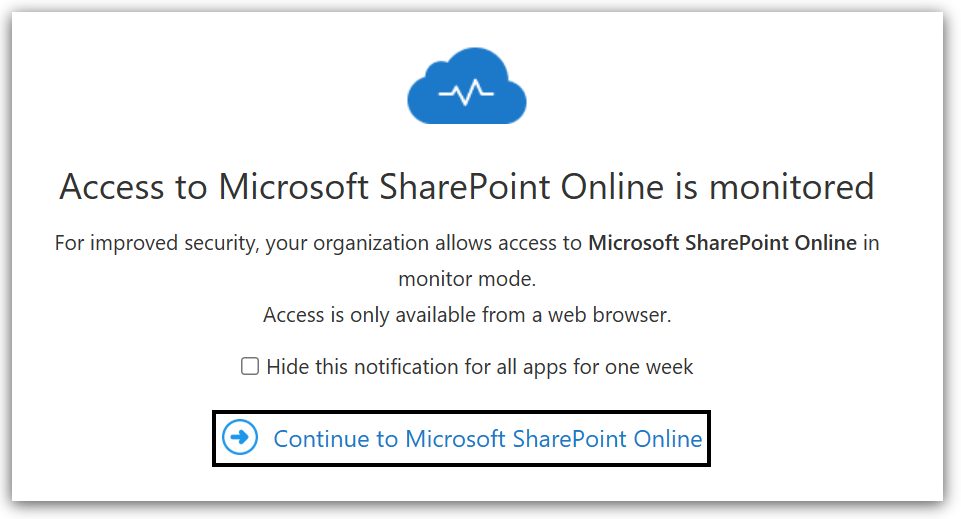
- Your browser may now show a screen advising that activity is monitored. Click the 'Continue to Microsoft SharePoint Online' link (located in the centre of the page) to be taken to the folders:

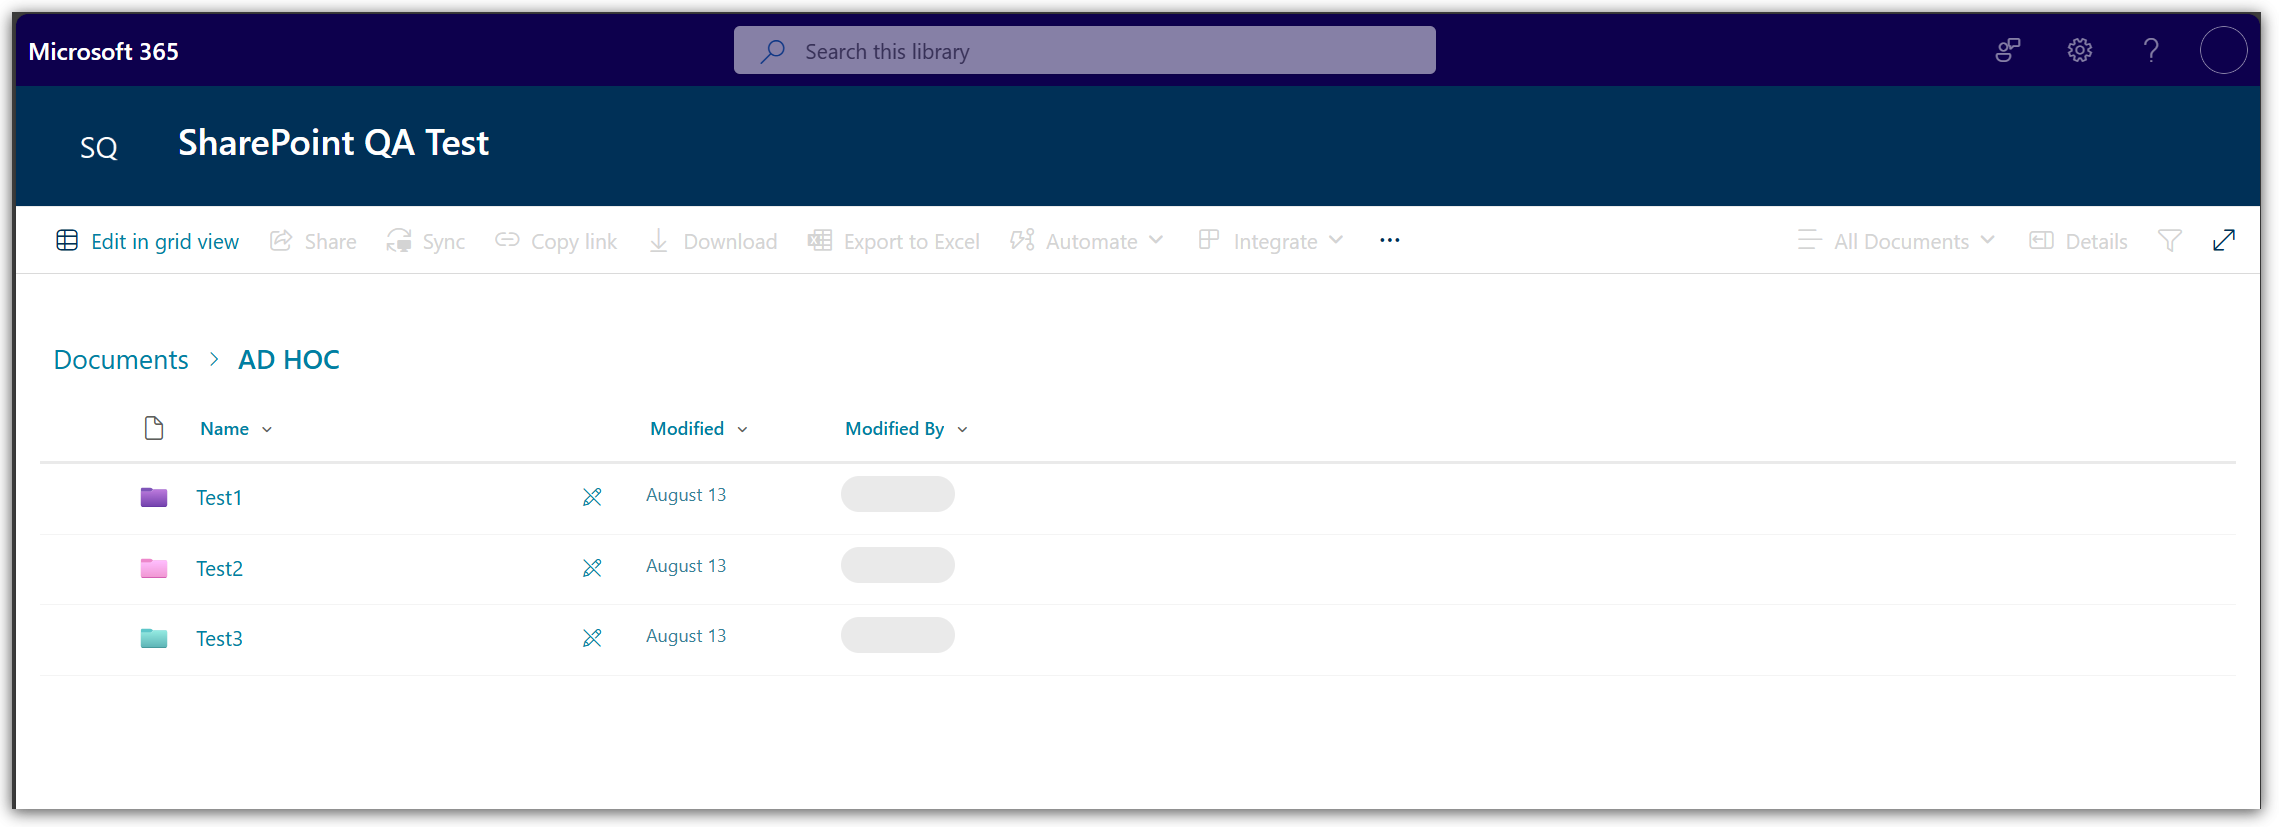
You will now see the folders that have been shared with you in the SharePoint interface:

|
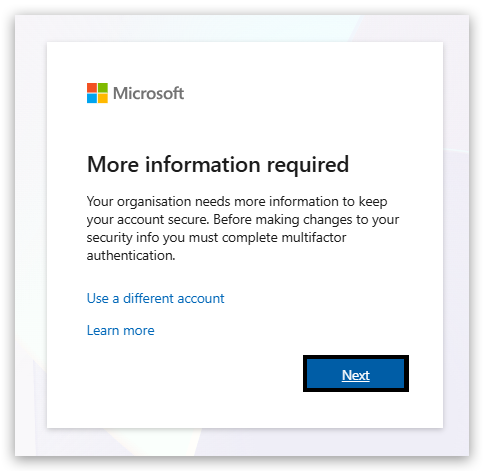
For users not yet registered with a guest account and MFA setup
You will receive an email from no-reply@sharepointonline.com with the subject line advising that a folder has been shared with you. The subject and email content will show the name of the Pearson employee who shared the folder with you:
- Open the email and then click on the 'Open' link located in the email body:
- You will be prompted to provide your guest account email address in the sign-in field at the centre of the page, and then click the 'Next' button (located below the email field) to proceed:
- You will be taken to a page that will prompt you to create your guest Microsoft account. Enter your guest account email address in the field provided and click the 'Next' button to continue:

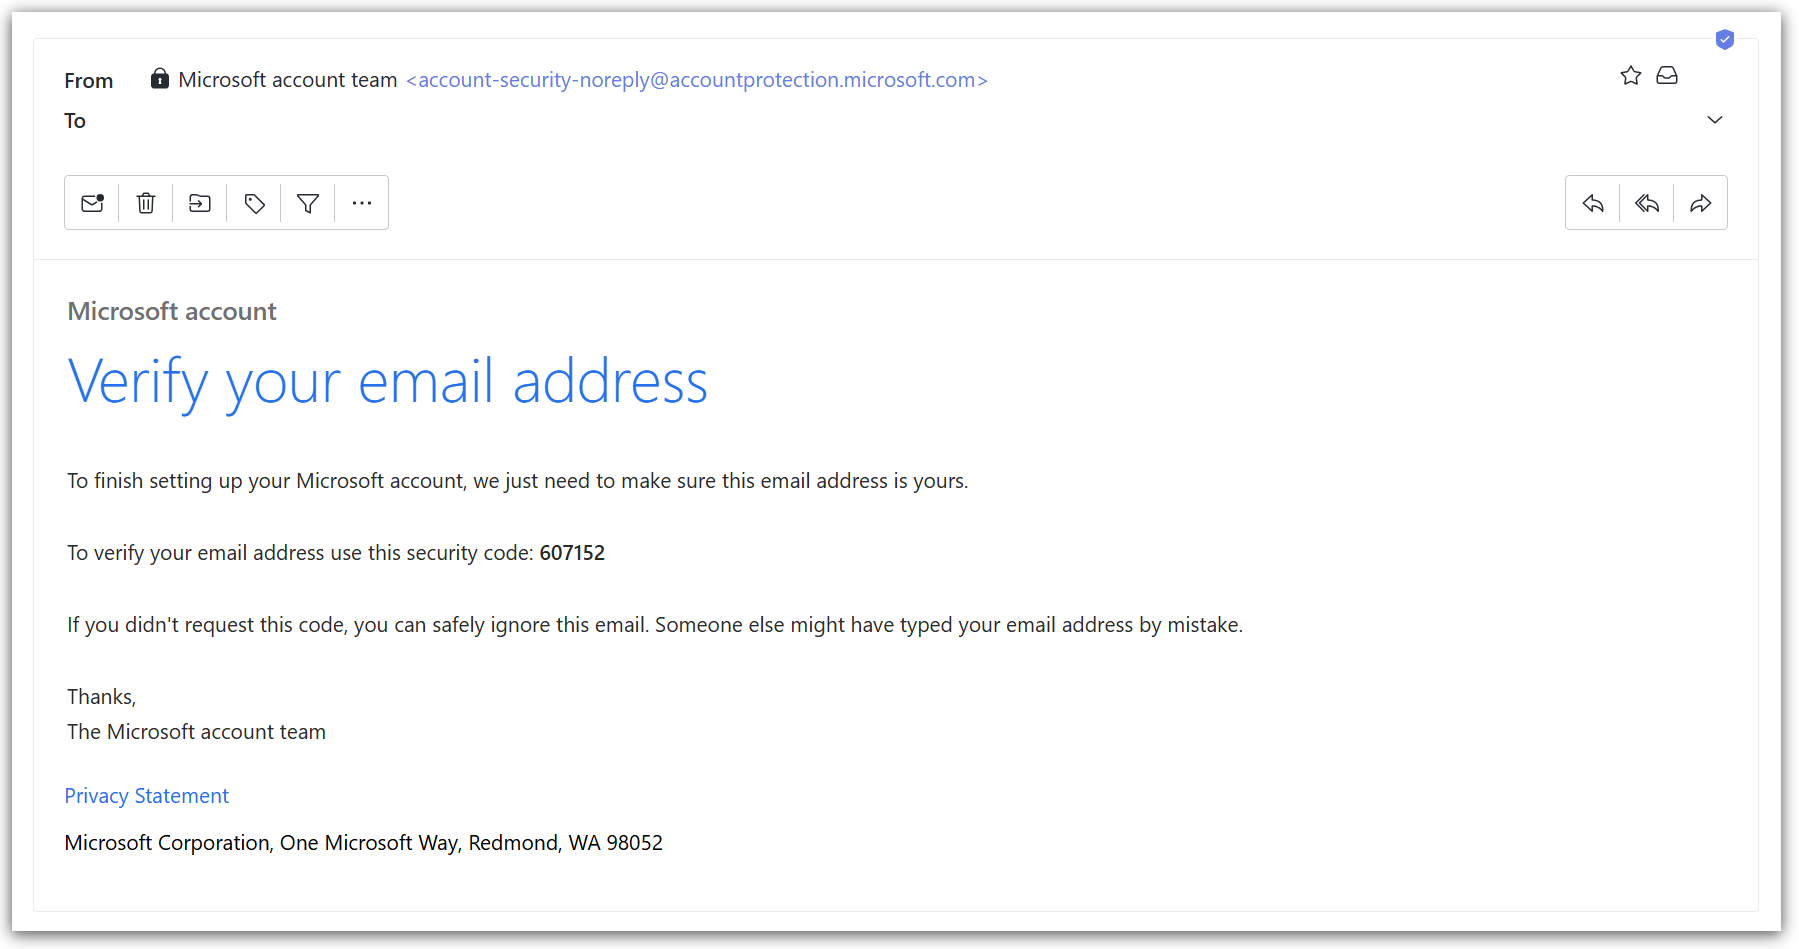
- You will be asked to verify your email on the next page:
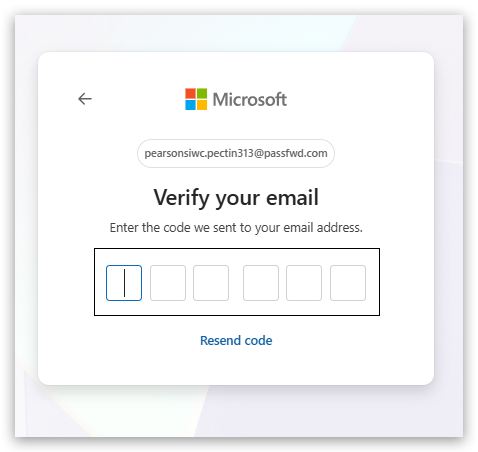
A security code will be sent to your inbox from account-security-noreply@accountprotection.microsoft.com with the subject 'Verify your email address' that needs to be typed into the verification field. An example of the email can be found below:
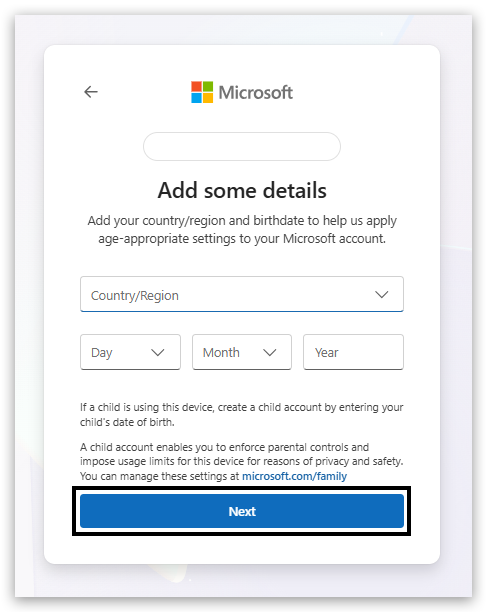
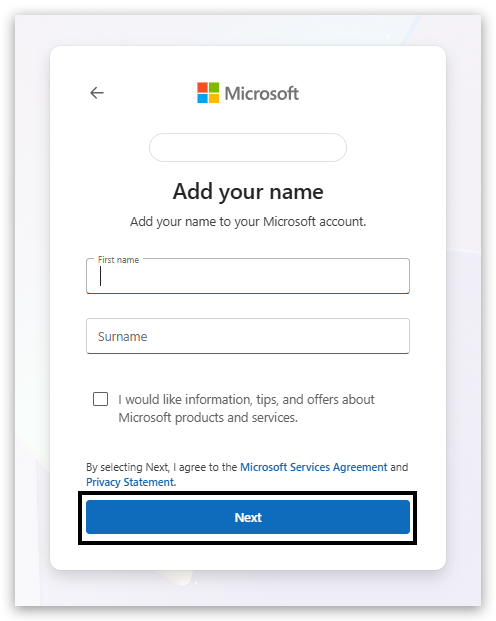
- You will then be asked to provide some basic details during the setup process. Please provide the details as instructed (including your name, country/region, and birthdate), then click the 'Next' button to continue through both pages of the registration form:
- You may then be asked to perform a simple verification step to prove you are human. Please follow the instructions on the screen to complete this CAPTCHA challenge:

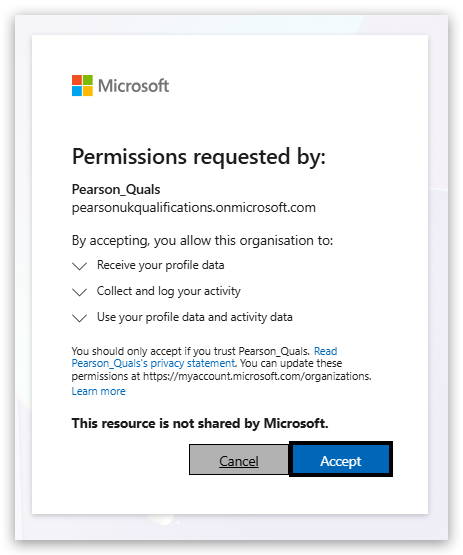
- You will then be asked to review the permissions and Pearson's privacy statement. Please click on the 'Accept' button (located at the bottom of the page) to continue:
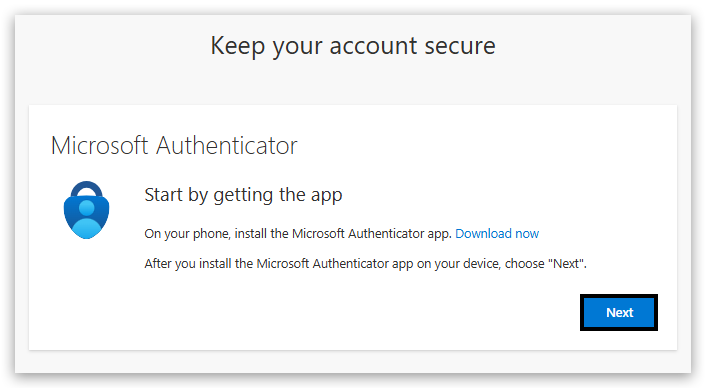
- You will now be prompted to set up multi-factor authentication via the Microsoft Authenticator app to keep your account secure. Click the 'Next' button to continue:
- You will be prompted to install the Microsoft Authenticator app on your smart device. Once you have this installed from your device's app store, click the 'Next' button to continue:
- Click 'Next' to continue setting up your account:
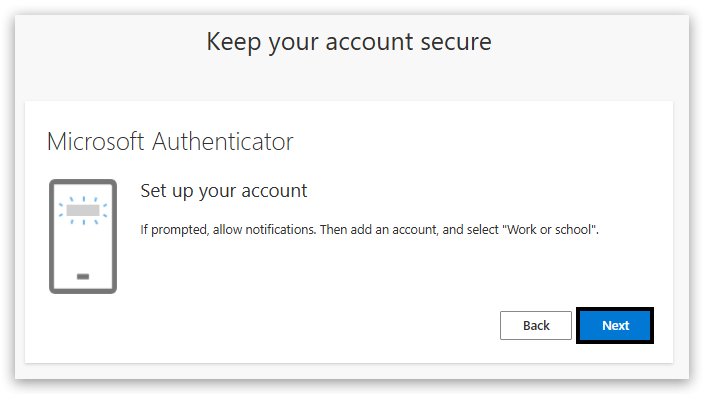
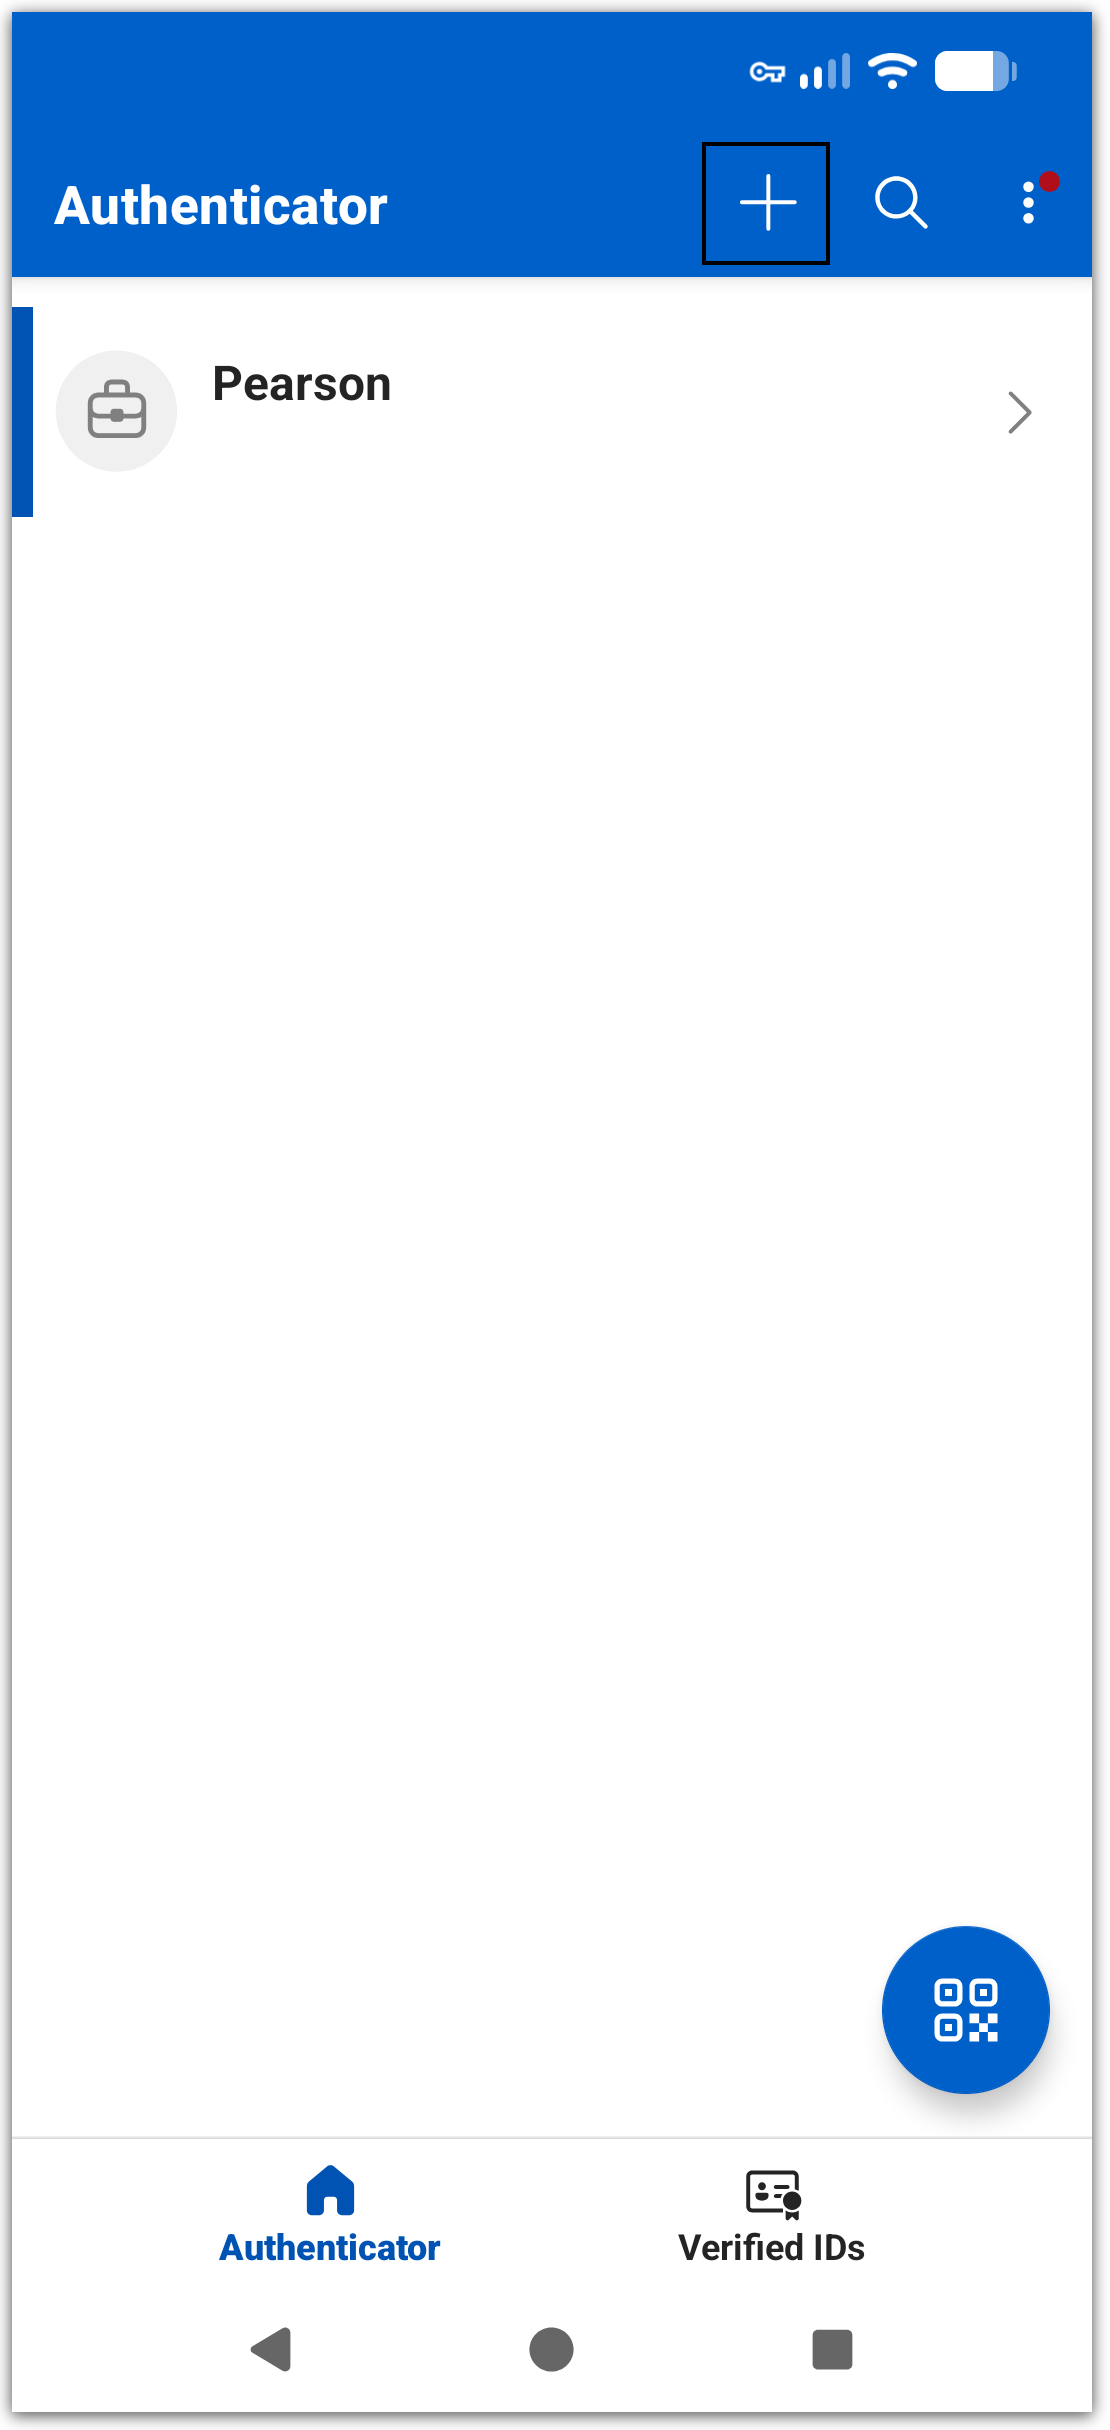
- From the main screen of the Microsoft Authenticator app on your smart device, select the '+' icon (Add Account icon, located towards the top-right of the screen) to begin adding the account:
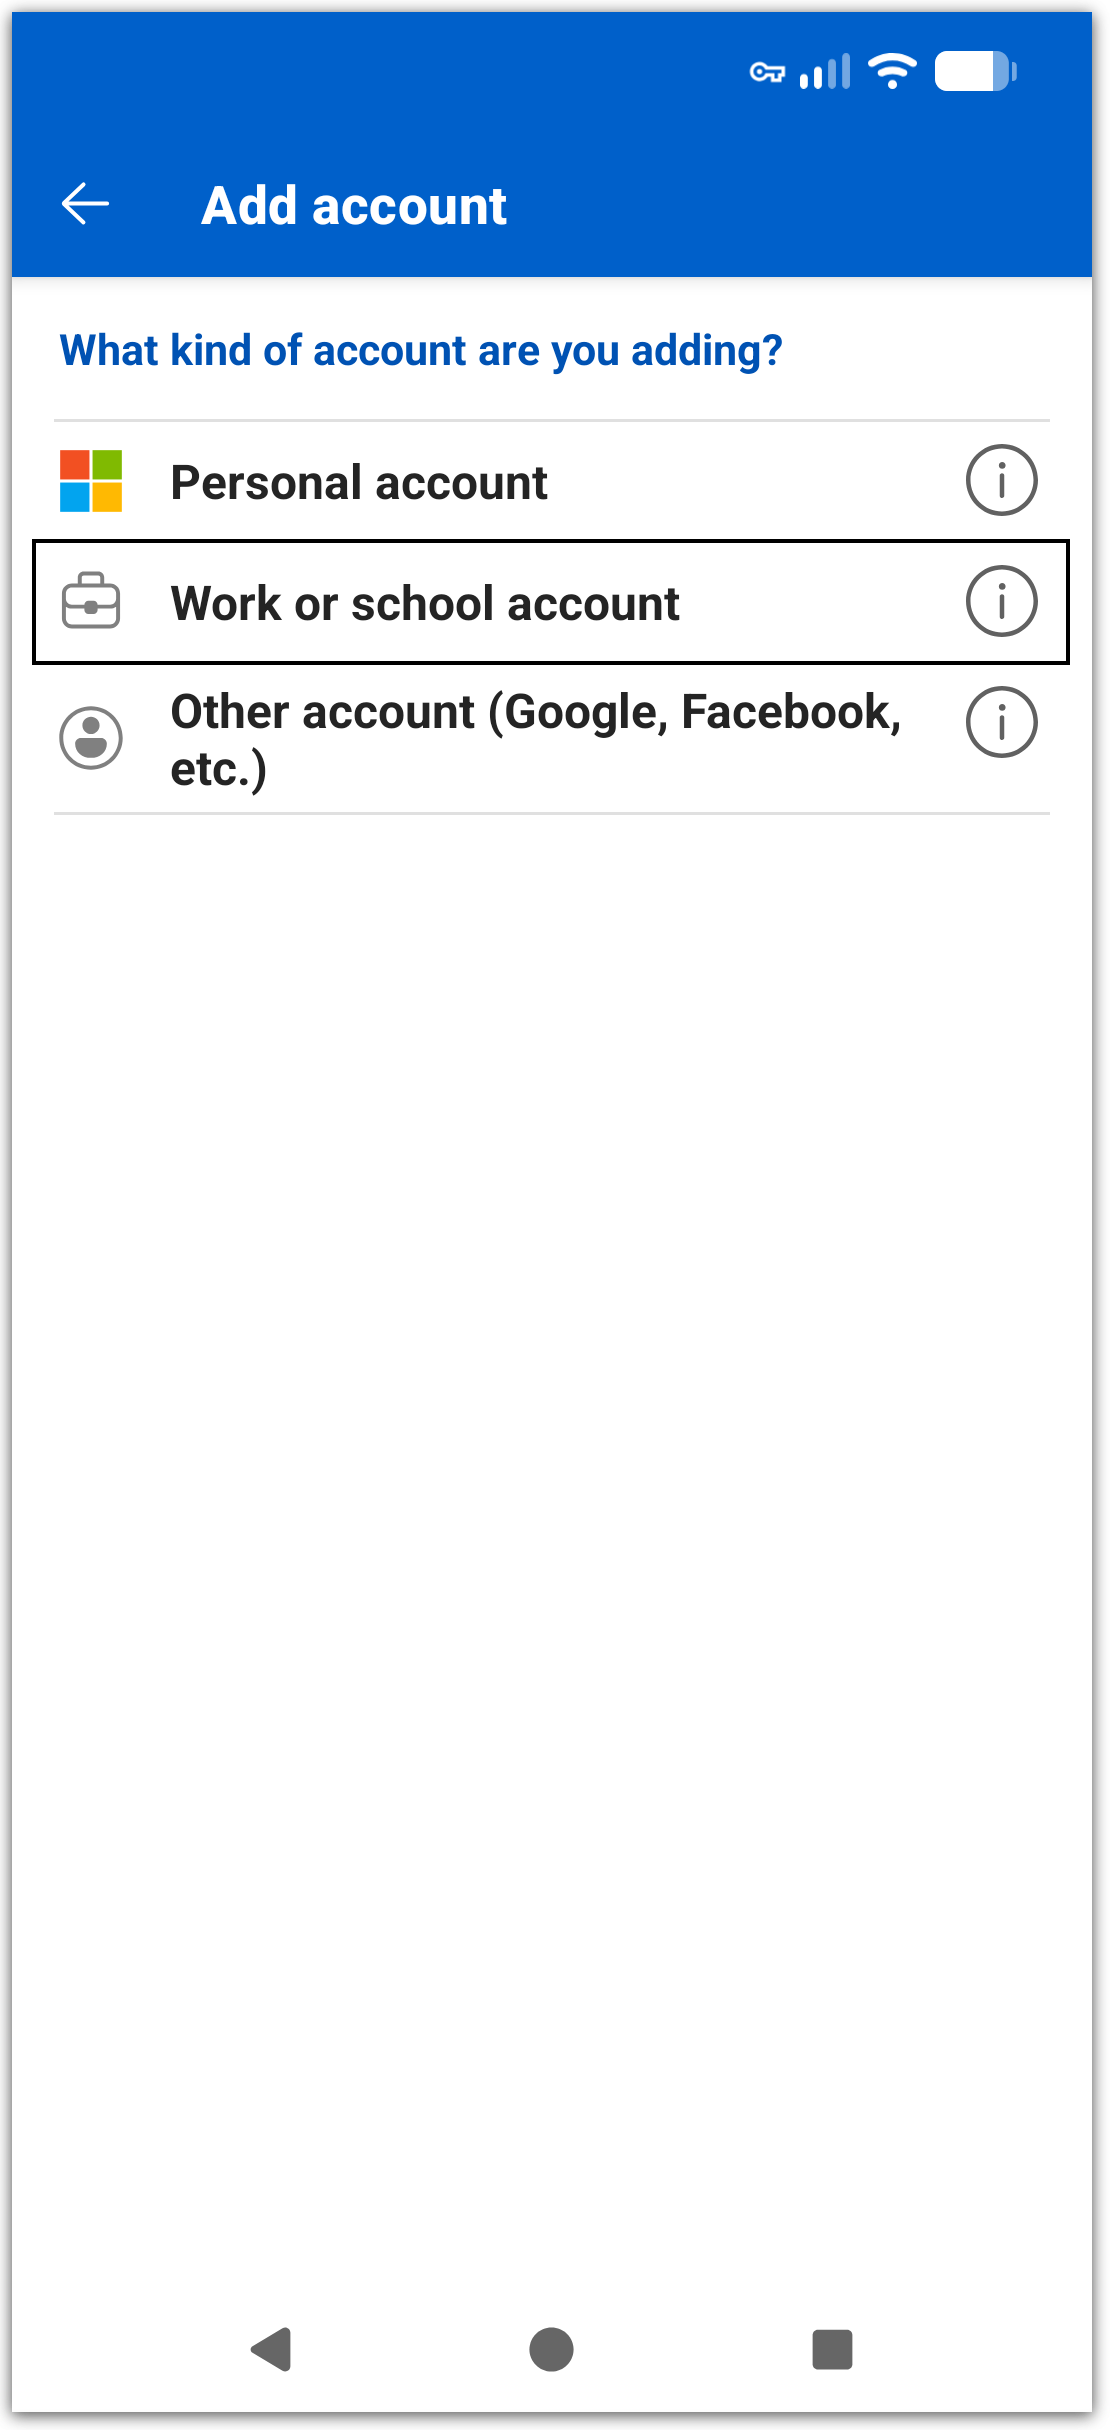
- On the next screen, select 'Work or school account' to continue:
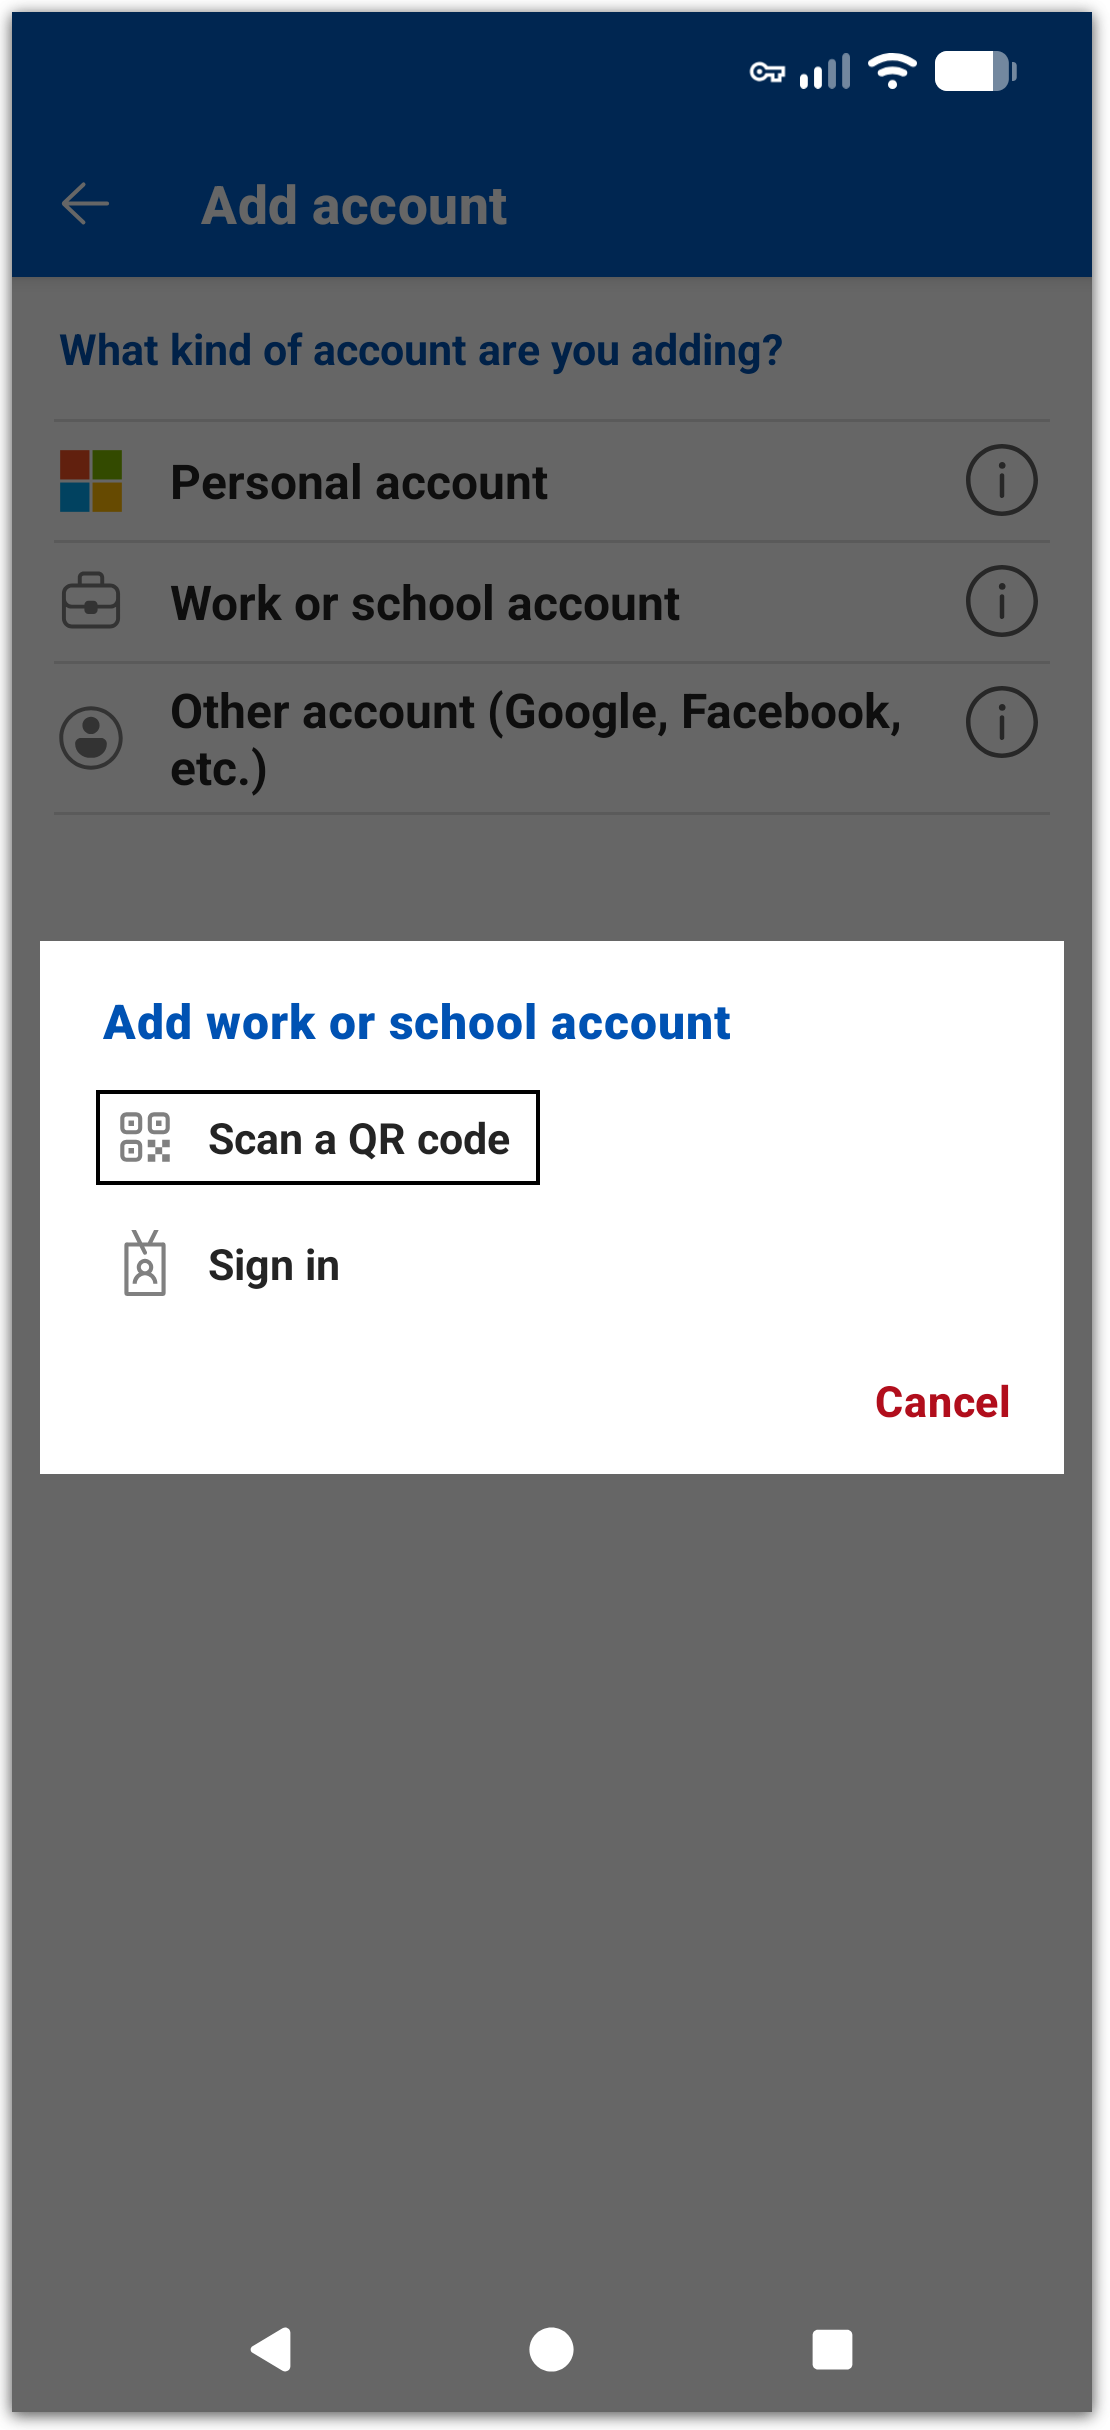
- On the pop-up that appears, select 'Scan a QR code' to continue:
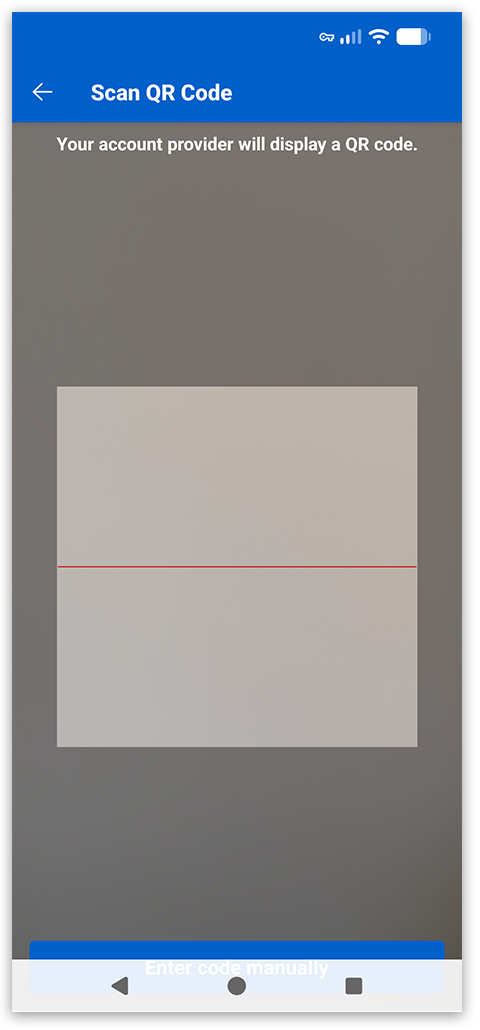
- The app will now use your camera to allow the scanning of a QR code:
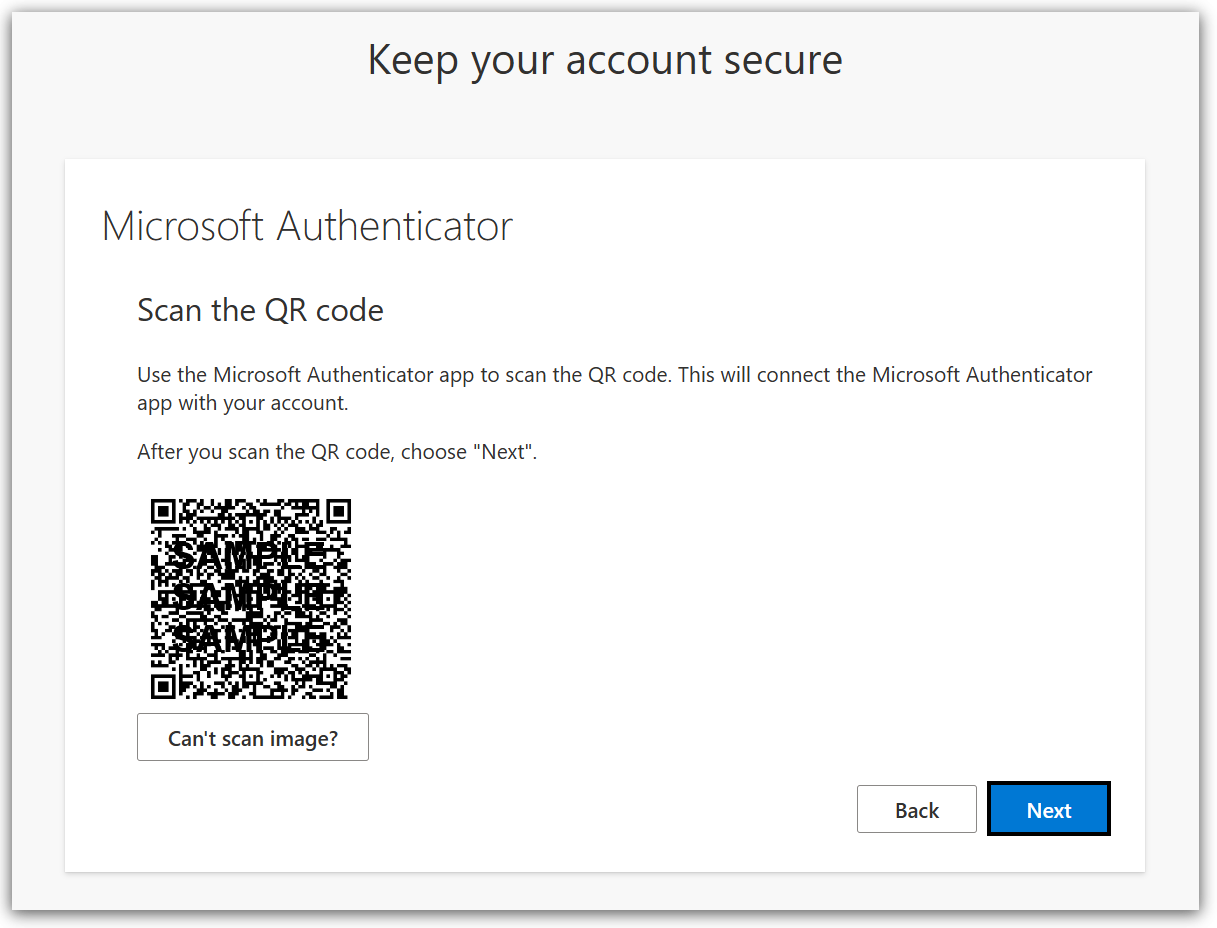
- Your browser should now display a QR code on-screen, which you need to scan with your smart device. Align the code so that it fits within the on-screen square in your app. After scanning QR code, click 'Next' to continue:
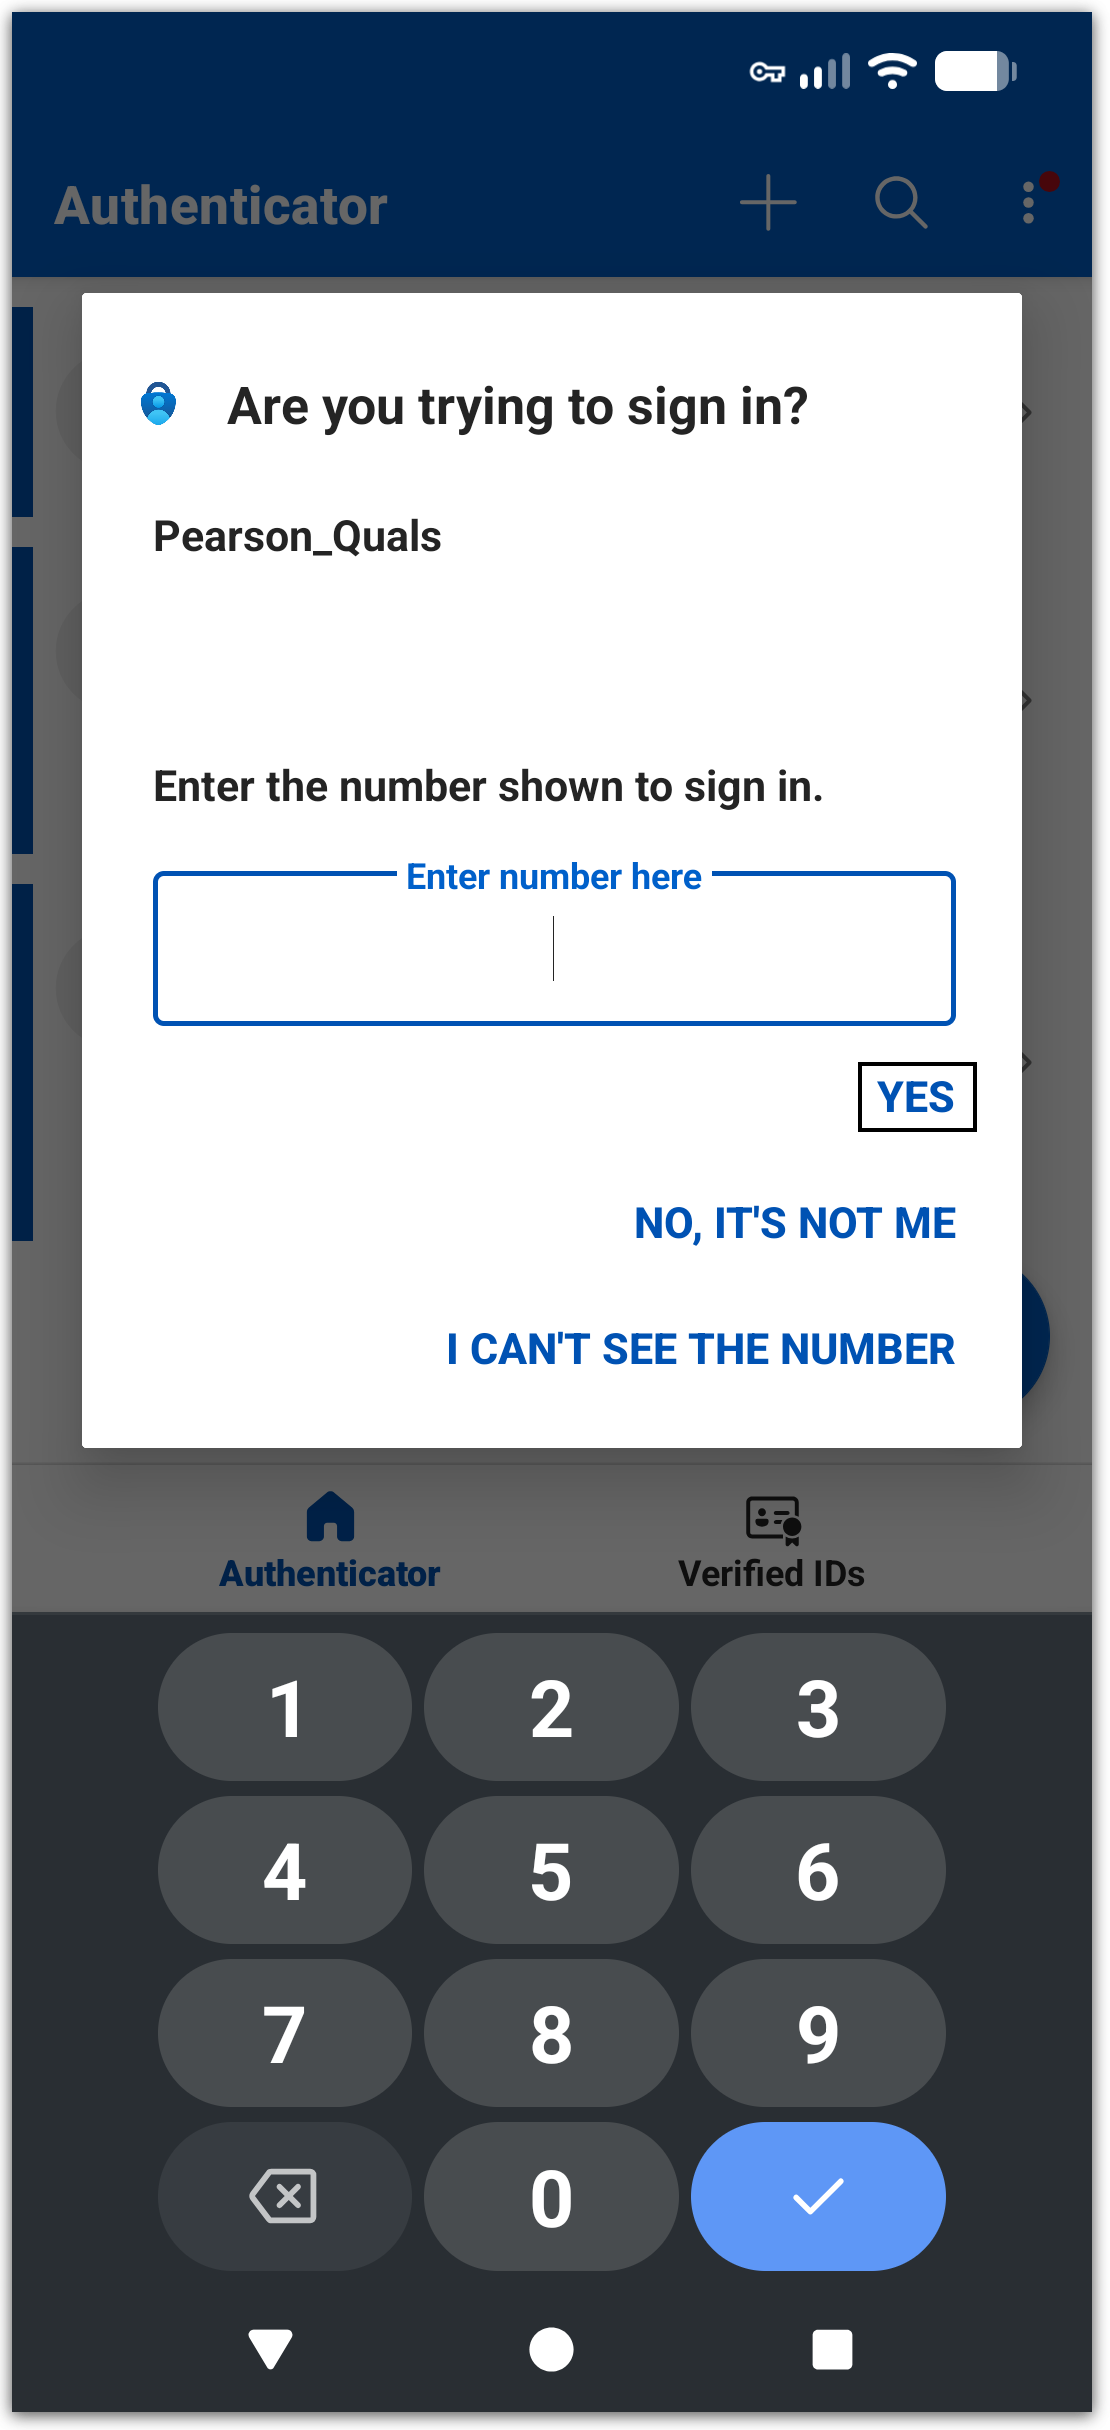
- An approval code will now be displayed in your browser:
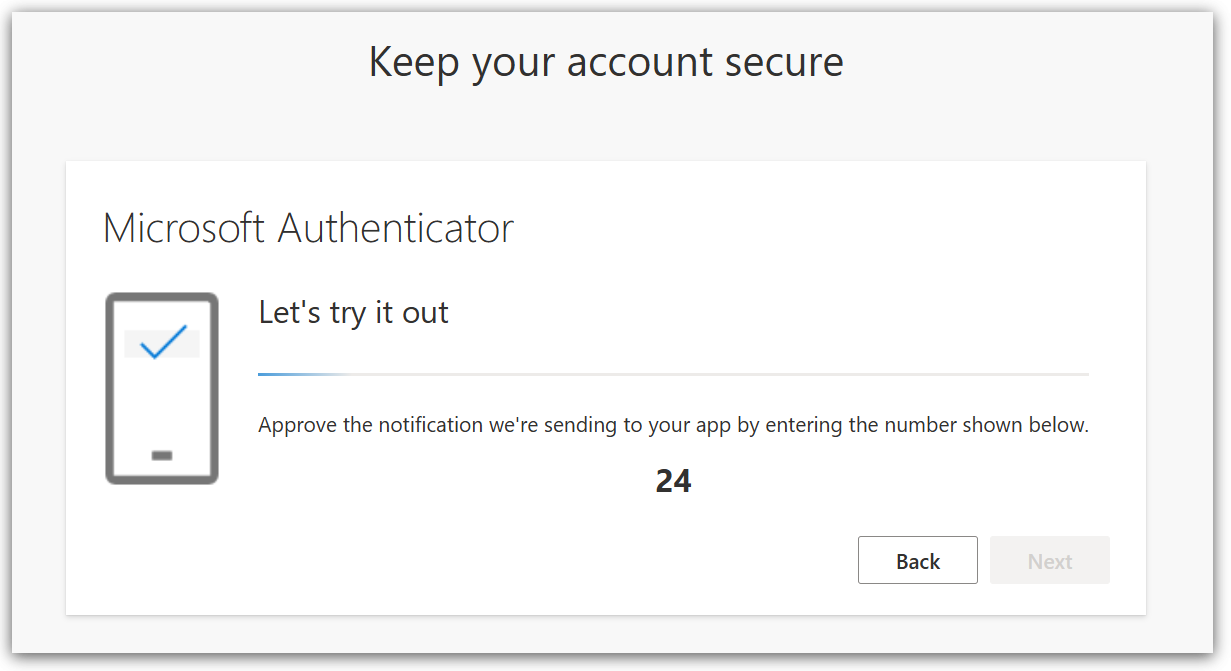
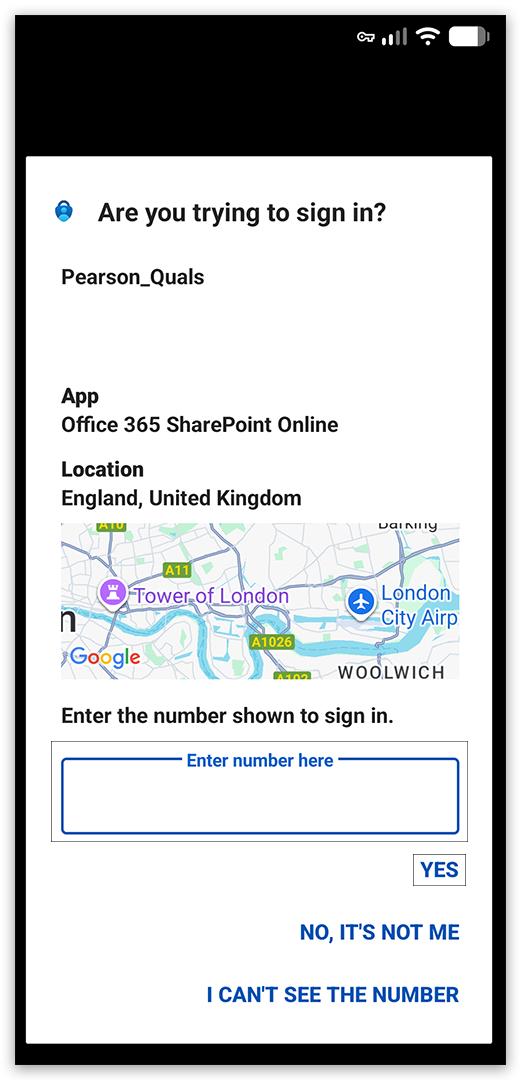
- Approve the notification on the Microsoft Authenticator app by entering the number as shown in the browser into the field in your app, then pressing 'YES':
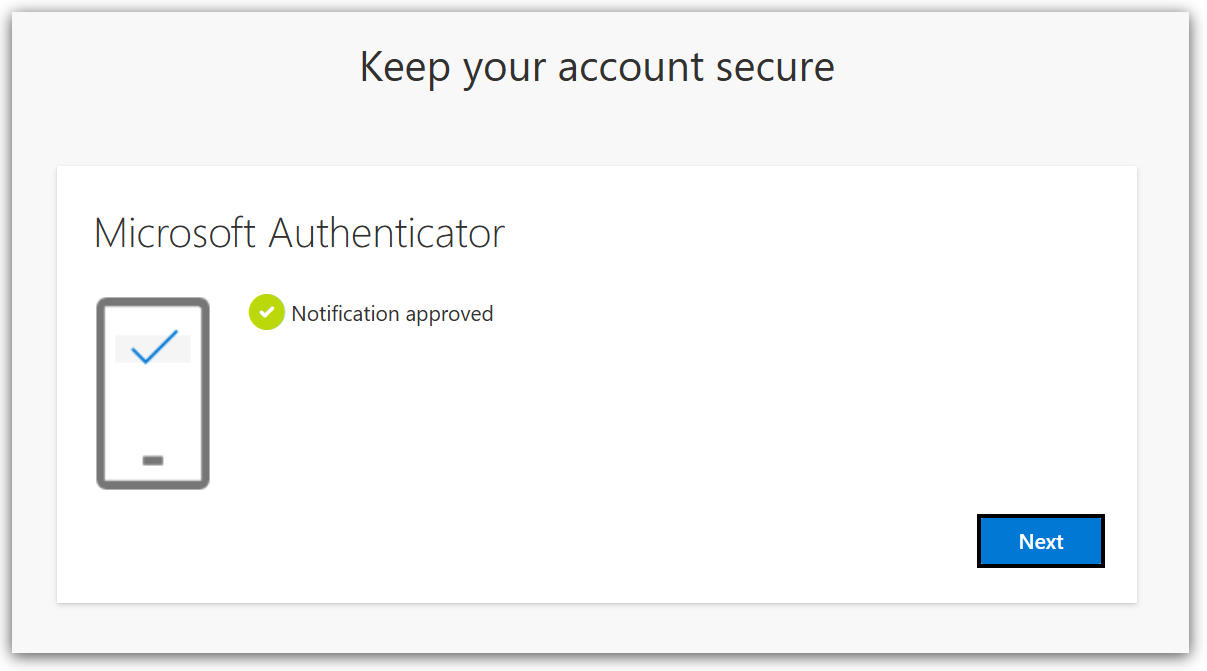
- After you complete the previous steps, you will see a confirmation screen in your browser. Click 'Next' to continue:
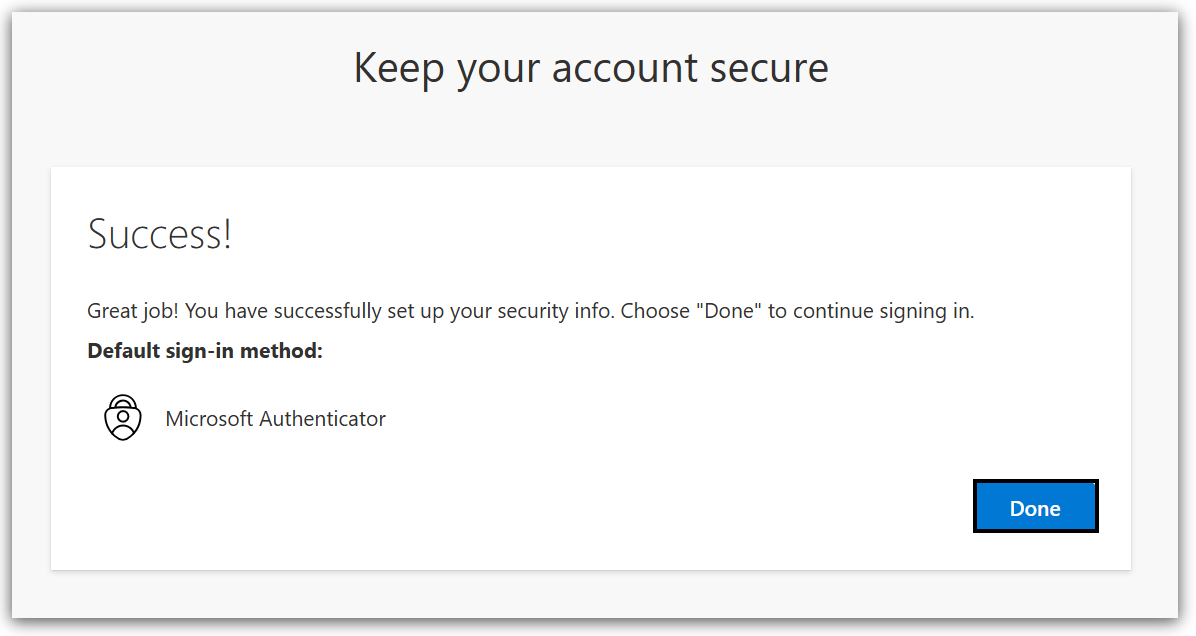
- You will then be notified that the setup is successful. Click the 'Done' button to complete your registration:
-
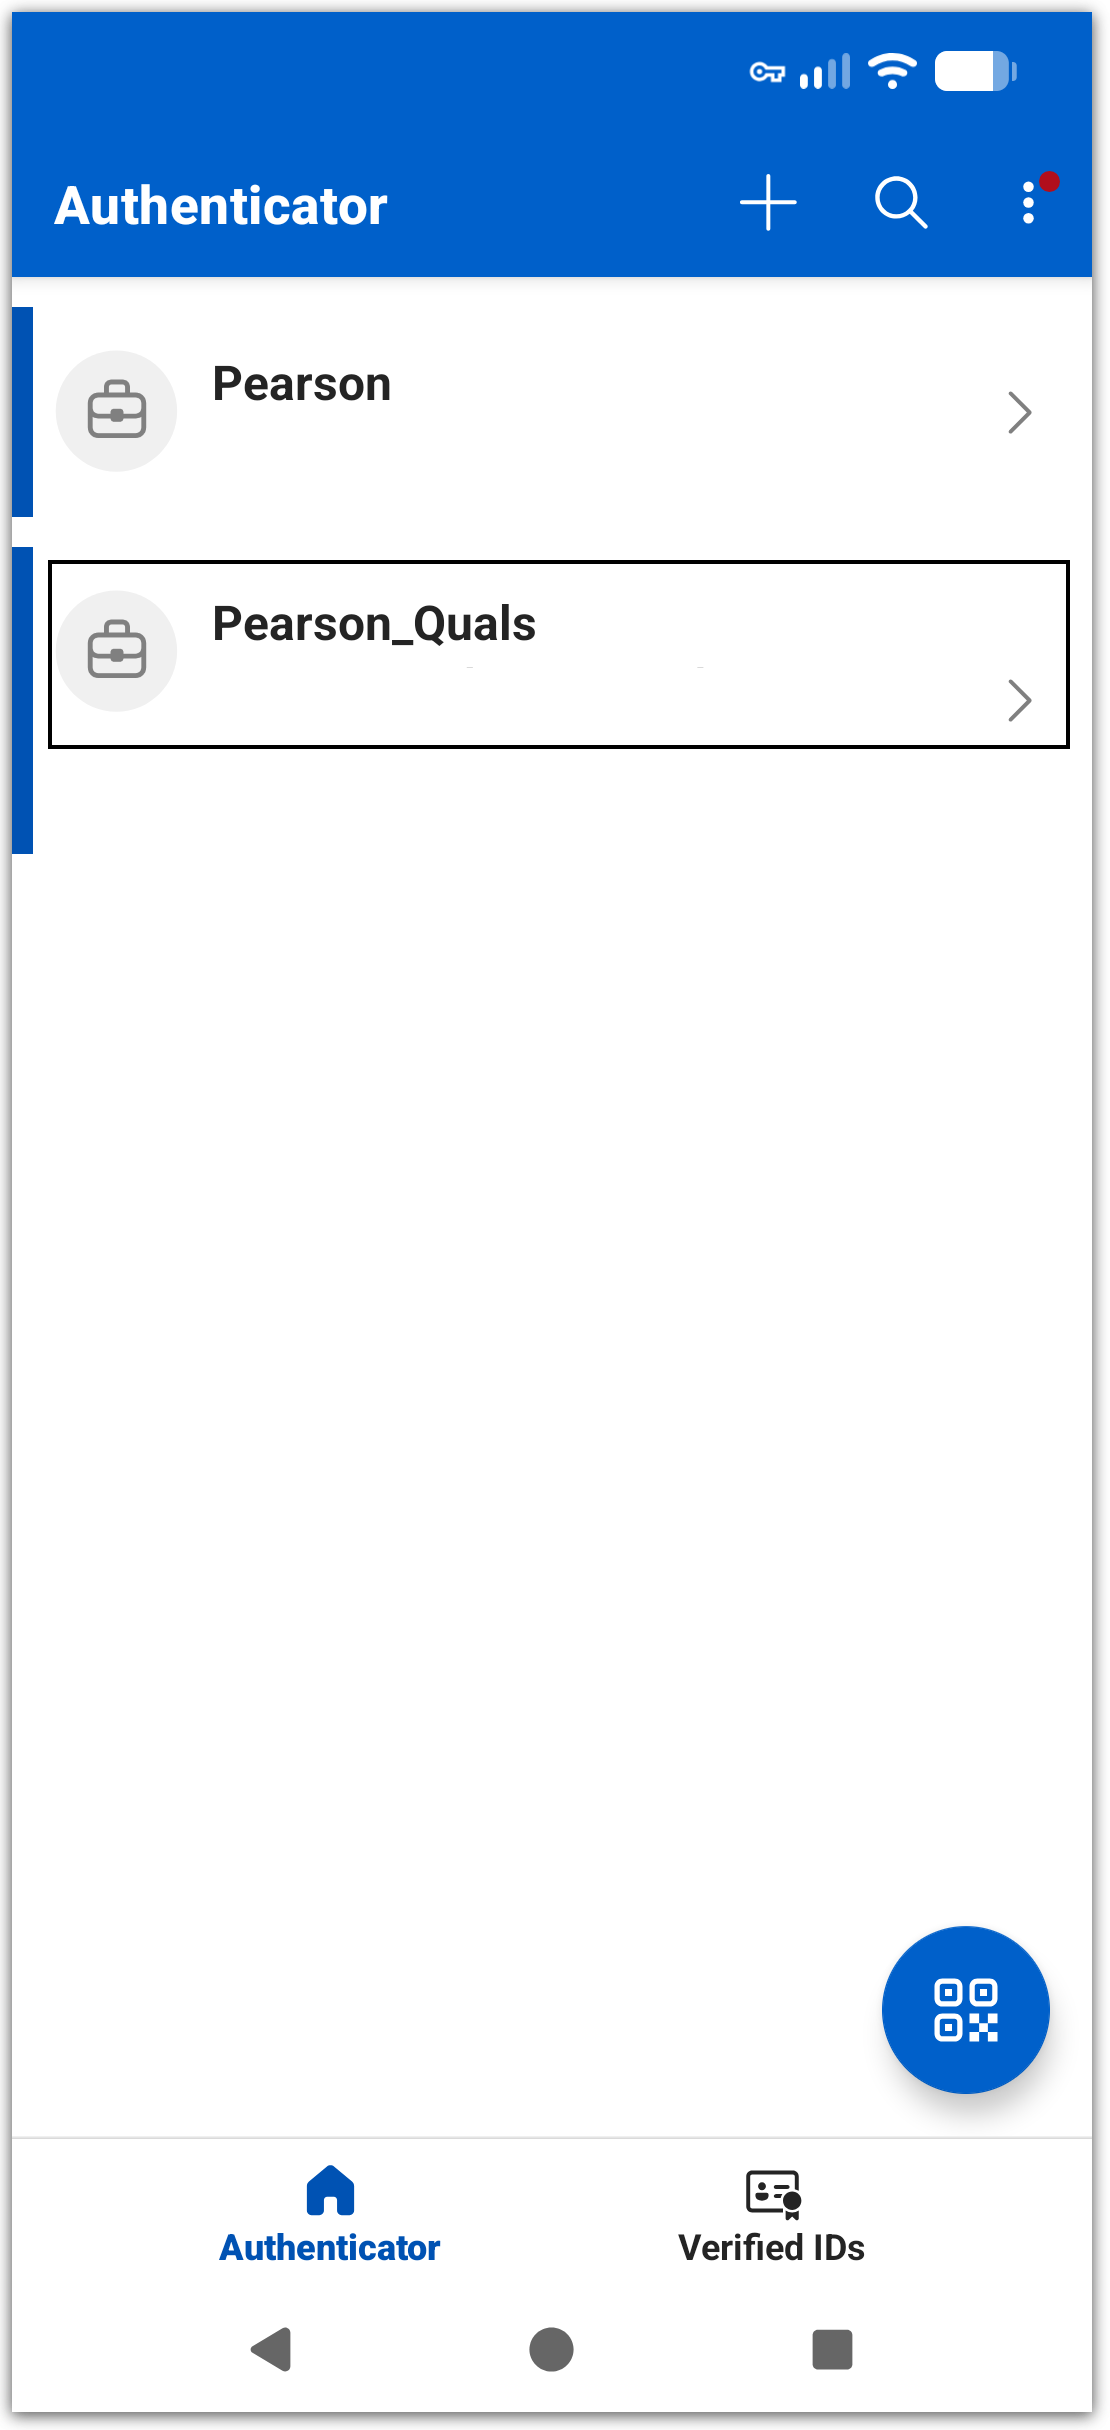
You will also see that the account has been added to the Microsoft Authenticator app, with 'Pearson_Quals' in the account name reference:
- Your browser may now show a screen advising that activity is monitored. Click the 'Continue to Microsoft SharePoint Online' link (located in the centre of the page) to be taken to the folders:
- You will now see the folders that have been shared with you in the SharePoint interface:
|
Related Articles:
Pearson Qualifications SharePoint: Registering Your Guest Account & Multi-Factor Authentication (MFA)
Pearson Qualifications SharePoint: Centre Guest Account FAQs