FAQ |
LAN (Classroom) Installation Guide
Overview
The LAN version of the Pearson Onscreen Platform (POP) software allows centres to run tests within a classroom setting via PCs connected to a network. | To successfully run POP LAN/Classroom tests, the following 4 pieces of software will need to be installed: |
- Exam Centre Service - Allows local distribution of the software, including communication between the centre and the Pearson server. The Exam Centre Service can be installed on any PC which is on the centre’s Network. However, many centres prefer to install on a dedicated server.
- Administrator Dashboard - Allows the downloading and preparation of the tests and the setting up of invigilators and rooms.
- Invigilator Dashboard - Starts the test and monitors learner progression.
- Test Player - Where a learner logs in to sit their test.
| This guide will explain how to install the software. Clicking on an accordion arrow (►) below will expand that section and provide guidance. Expanded sections can be closed by clicking the accordion arrow (▼) again. |
Communication & networking
The Exam Centre Service server communicates via https (Port 443 TCP) to the Pearson servers. | The Administrator Dashboard, Invigilator Dashboard and Test Player communicate to the Exam Centre Service over ports 52221 & 52222. | Port range to be open: 52221 - 52250. | Any software firewall on the Exam Centre Service PC will need to be open to allow it to communicate with the Pearson servers. | Please note that your network must allow incoming and outgoing traffic over port 443 to reach our IP / web addresses 159.182.72.158 and https://btecng.pearson.com. | Connection to the internet is required only for the Exam Centre Service, and this must be available for the duration of the exam. A normal ADSL connection is recommended (1MB), although higher speeds will enhance the overall performance. | It is essential that all PC's used are set to Greenwich Mean Time (GMT) / British Summer Time (BST); this will synchronise with our servers and allow all machines to communicate with each other. You can use the Time Protocol to make sure your systems are set up to the correct time. | Please note that the software has been designed to run on Windows Professional operating systems, and we do not support the Home edition of Windows. |
Technical requirements
Exam Centre Service PC | Pentium III with 900Mhz processor. | Access to the Internet (ADSL 1Mb minimum) via reliable ISP 10 / 100 Mbps network interface adapter (tethered mobile / tablet connections using 3G / 4G / 5G networks are not supported). | Disk space according to centre size and needs, a shared drive visible for all network users, with a minimum 1GB of space to be used for installation, test and response packages. This space will vary depending on the number of learners in the centre, and the number and size of tests. | Windows 7 (or greater). | Microsoft .NET 4.5 (Full or Extended version) or greater. |
Firewall ports that need to be open:
- Internal - 52221 & 52222
- External - 443
| | Administrator / Invigilator Dashboard PC | Pentium III with 900Mhz processor. | 2GB RAM. | 10 / 100 Mbps network interface adapter. | Printer (local or network) - optional. | Windows 7 (or greater). | Microsoft .NET 4.5 (Full or Extended version) or greater. | Firewall ports that need to be open 52221, 52222, 443. | | Test Player PC | Pentium III with 900Mhz processor. | 1GB RAM. | 100MB storage capacity. | Minimum 1024 x 768 screen resolution. | 10 / 100 Mbps network interface adapter (for local mode only). | Windows Media Player 11 (or greater). | Access to the Internet (ADSL 1MB minimum) via reliable ISP. | Windows 7 (or greater). | Microsoft .NET 4.5 (Full or Extended version) or greater. | Firewall ports that need to be open 52221 & 52222 | Student users will require individual/local Windows log-ins. Mandatory log-ins/user profiles must not be used |
Installing the Exam Centre Service
1. Download the Exam Centre Service .msi installer here. | | 2. Click on the Edi.Advance.Tdp.ExamCentreService.Setup file to begin running the Setup Wizard: |  | | 
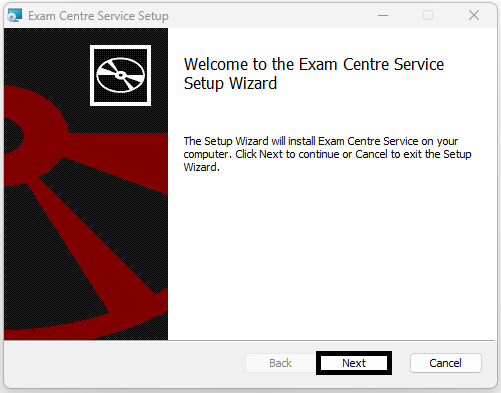
3. Click Next to be taken to the next step: |  | | 4. This screen allows you to specify where the Exam Centre Service is installed. Once confirmed, click Next to continue: |  | | 
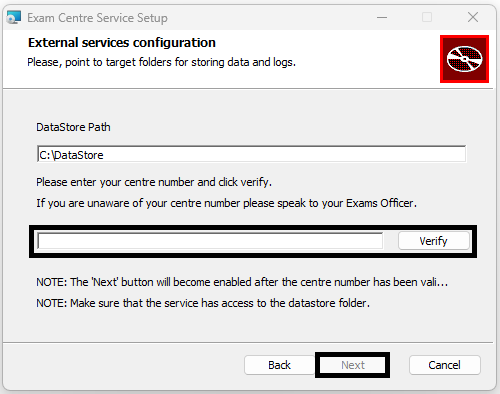
5. This screen allows you to specify where the Datastore folder will be located. This is where the Apps and Packages folders will be located (further details can be found in the Datastore section below). You will also need to verify your 5-digit centre number. Once the file path has been confirmed and centre number verified, click Next to continue: |  | | 6. This screen will ask you to point to the target folder for the .msi installer files. Once confirmed, click Next to continue: |  | | 
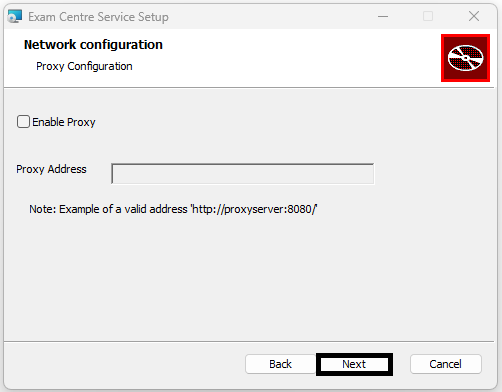
7. This screen will allow you to enable a proxy address, if your centre uses one. If you do not use a proxy, you can leave the Enable Proxy checkbox empty. Once confirmed, click Next to continue: |  | | 
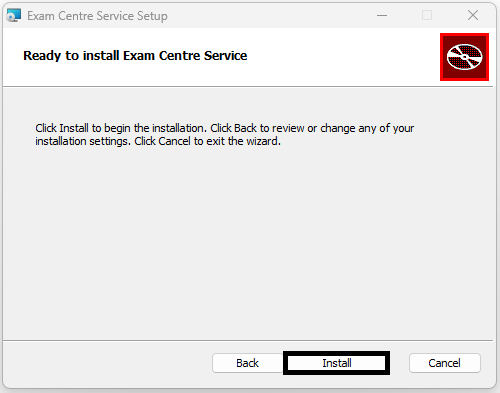
8. If you are happy with the setup, clicking Install on the next screen will begin the installation of the Exam Centre Service software: |  | | 9. Once installation is complete, click Finish to close the Setup Wizard. A README file will open by default, which provides links to the other software: |  
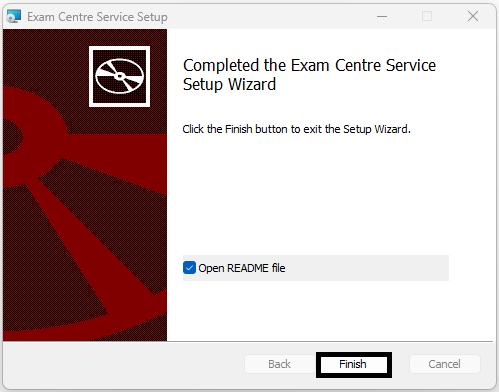
Please note you do not have to use the README file to install the other software components. Instead you can install from the Datastore/Apps folder, which is covered in the steps below. |
The Datastore
Once the Exam Centre Service is installed, it will create a folder in the C: drive of the computer called DataStore. Upon initial installation, the folder will contain Apps and Packages folder, as well as an EcDatabase.sdf file: |  If you have already installed and used the software previously, this folder may also contain 2 other folders: RecoveryData and Responses. | | In the Apps folder, you can find the .msi installers for the other software components: |
- pearson.pop.administrator
- pearson.pop.invigilator
- pearson.pop.testplayer
|  |
Installing the Administrator Dashboard
1. Click on the pearson.pop.administrator installer file will open the Setup Wizard. Click Install to begin the installation process: |  | | 2. Once the installation is complete, click Finish to close the Setup Wizard: |  | | Please note | The Administrator Dashboard should be installed on the Examinations Officer's computer. |
Installing the Invigilator Dashboard
1. Click on the pearson.pop.invigilator installer file will open the Setup Wizard. Click Install to begin the installation process: |  | | 2. Once the installation is complete, click Finish to close the Setup Wizard: |  | | Please note | The Invigilator Dashboard should be installed on a computer in the room where tests take place. It can be installed on the same PC as the Administrator Dashboard, if required. |
Installing the Test Player
1. Click on the pearson.pop.testplayer installer file will open the Setup Wizard. Click Install to begin the installation process: |  You can configure the Invigilator PC at this point, but it is not necessary as this can be done after the Test Player is installed. | | 2. Once the installation is complete, click Finish to close the Setup Wizard: |  | | Please note | The Test player should be installed on all computers where learners will sit tests. |
Initial Test Player setup
1. Log into the Administrator Dashboard using your Pearson Onscreen Platform credentials: |  | | 2. Within the left-hand menu under Invigilators, please select Create New: |  | |
3. Add details to the fields within the screen:
Login Name is the username your Invigilator will use to log into the Invigilator Dashboard.
First Name and Last Name fields should reflect the Invigilator details.
|
The Password is also used to log into the Invigilator Dashboard. It must be at least 8 characters in length and include at least 3 of the following:
Uppercase letter (A-Z)
Numerals (0-9)
Special characters (e.g. ! £ ? # %)
| Place a tick in the Active checkbox and then click Create to setup the Invigilator account: |  | | 4. Log into the Invigilator Dashboard with the credentials created in the previous step: |  | | 5. Open the Test Player to be taken to the Check Connection to Service screen. Start auto discover will automatically find the Invigilator Dashboard as long as it's located within the same network. Alternatively, you can use the Add manually option to perform this manually: |  | | 6. Once the Invigilator Dashboard is located it will appear as below. Selecting this should present 2 green ticks within the icon image, which indicates the Invigilator Dashboard software is running: |  If you see a red cross within the image instead, you will need to log into the Invigilator Dashboard again. | | 7. Click Test connectivity for the software to perform some diagnostic steps. If all steps have a green tick, the software is correctly installed and connected across your network. Click Finish to complete setup: |  | | 8. Setup is now complete and you will see the main login page for testing. The Test Player can now be closed: |  |
Updating the software
We periodically release new versions of the POP LAN software to make improvements and fix minor issues. We strongly recommend ensuring that the latest version of the software is installed so that your users and learners have the best experience during tests. | In order to update the software, you should first uninstall the Exam Centre Service and then reinstall using the .msi installer link found in the Installing the Exam Centre Service section above. | Once the updated Exam Centre Service has been installed, you will need to reinstall the Test Player using the pearson.pop.testplayer installer file, found in the Datastore/Apps folder. | | Please note | It is not necessary to uninstall the Administrator and Invigilator Dashboards. When you launch the relevant software and a new version is available, you will see the following message: |  | | Click on Download and the new version will be installed on to your PC. |
Return to the support index. |
|
---|