
The following information demonstrates the steps required for creating and managing applications for access arrangements via Pearson Access Arrangements Online (PAAO)
The Qualifications accessible in PAAO are as follows :
- Edexcel Award
- International GCSE
- Level 3 Core Maths
Candidates must be registered for the Qualification required to enable an Access Arrangement Application to be created however for International GCSE qualification only, the candidate would need to be created in PAAO prior to creating the application.
Please select from the options below to see the steps required for the listed processes:
How to access PAAO
1. To sign in, please go to https://edexcelonline.pearson.com; you will be asked to enter your usual Edexcel Online credentials, and once you click sign in, a verification code will be sent to the Pearson Authenticator app.
For further information, including downloading the app to your mobile device and using it to complete the sign-in process. Please see Pearson Portal Authenticator for details.
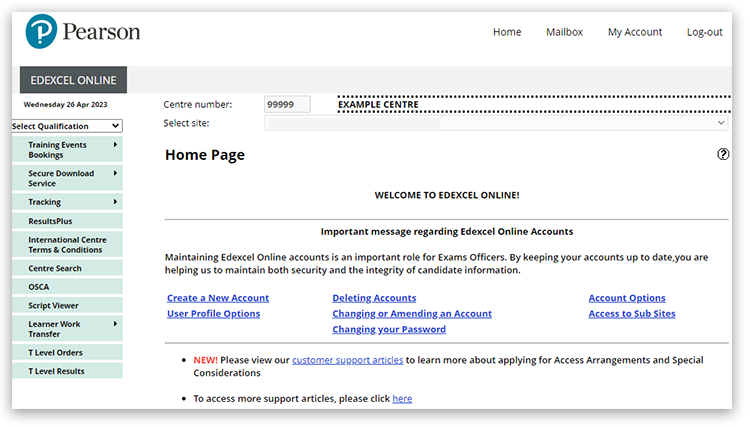
2. You will then be directed to the EOL home page:
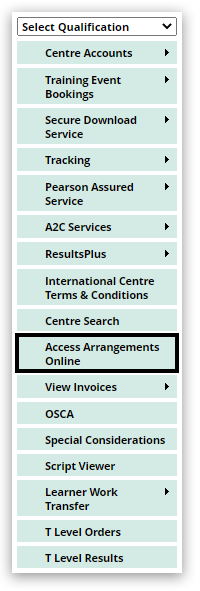
3. Select 'Access Arrangements Online':
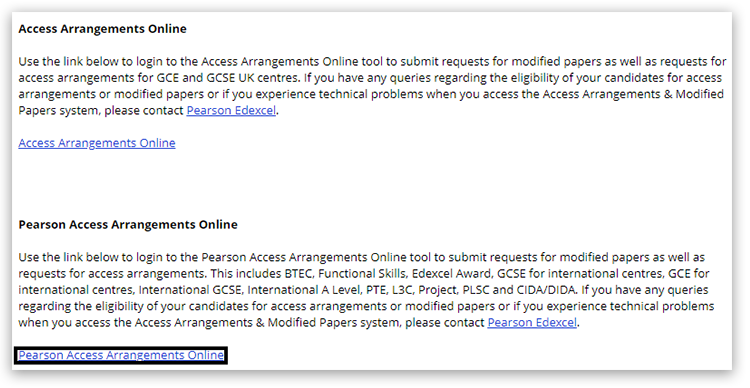
4. Click the link 'Pearson Access Arrangements Online' from the bottom of the page:
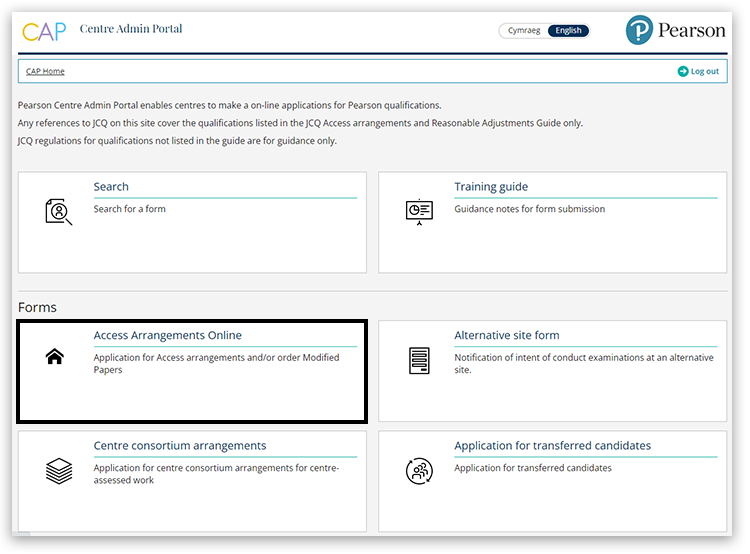
5. You will now be on the 'Centre Admin Portal' (CAP), where you have access to submit various applications and training guides.
Please note: if you ever complete a Form 8 (profile of learning difficulties), Form 9 or Form 8RF (profile of learning difficulties) from here, please provide the reference number this provides within the 'Additional Evidence' section further into this process.
Select the 'Access Arrangements Online' option:
|
Locating learners on PAAO for a new application
10. Select 'Create Application':
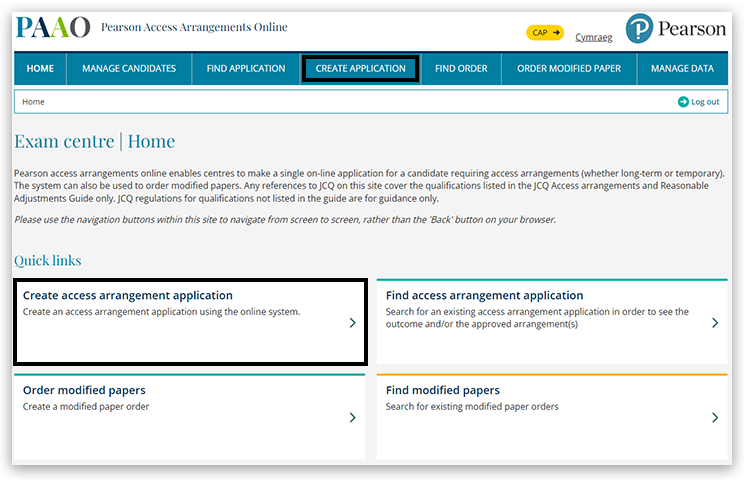
11. Select the required Qualification(s) (multiple qualifications can be selected):

12. Next, enter the candidates' surname only. Please check that the correct centre number is displayed (this must be where the candidate was first registered), then press 'Search':
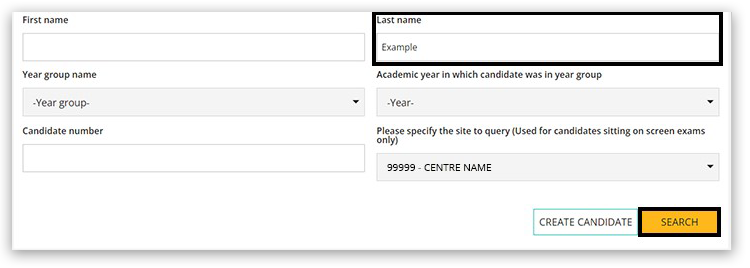
13. When the candidate appears at the bottom of the page, select 'New':

|
Confirming the centre and academic year for selected learners
14. Select the required centre number, application duration and specific academic year, then click 'Next':
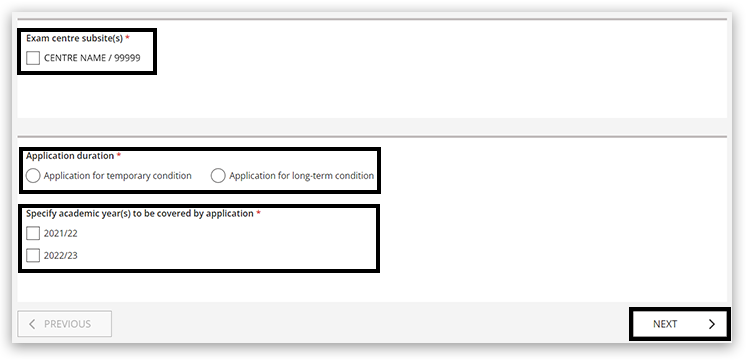
15. Select the required arrangement(s) and select 'Next'. If you cannot see what you need listed, select 'other', and you will be able to state what is required further on in this process:
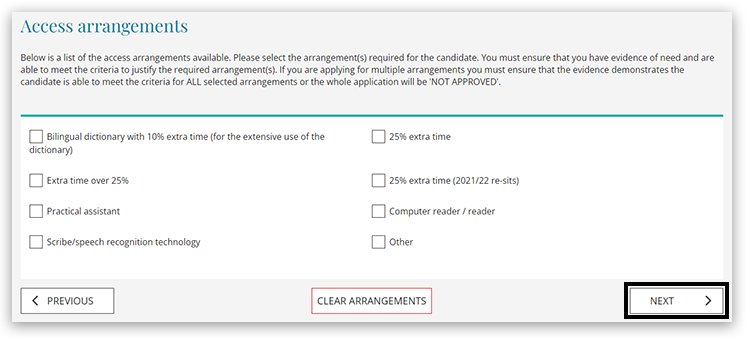
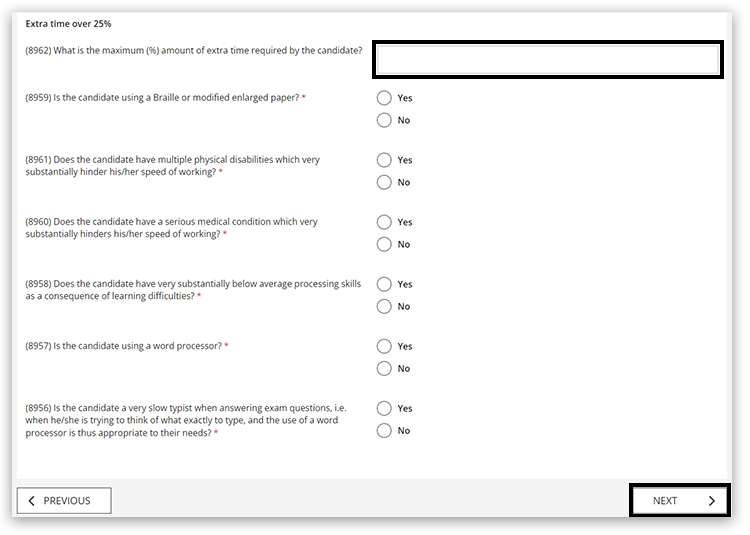
16. Where extra time over 25% has been selected in the previous step, state the correct amount of time required and answer the yes / no questions specific for the candidate, then select 'Next'.
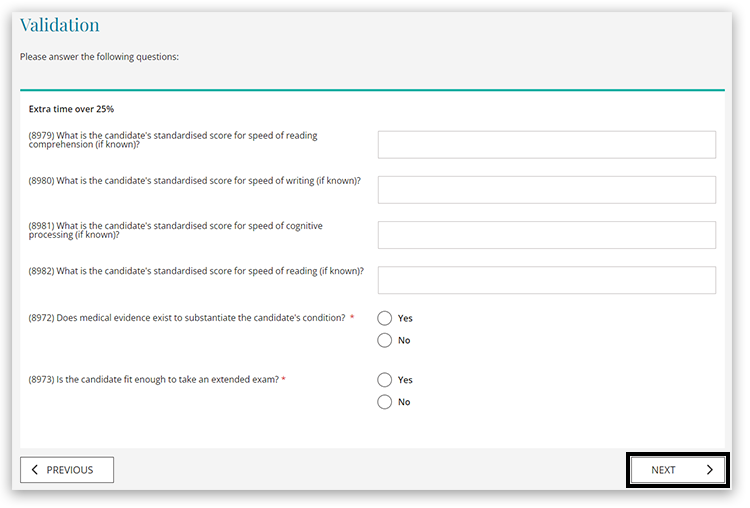
17. The next screen you will see will depend upon the answers provided to the questions on the previous page. Enter the standardised scores required and select 'yes / no' where required, and then select 'Next':
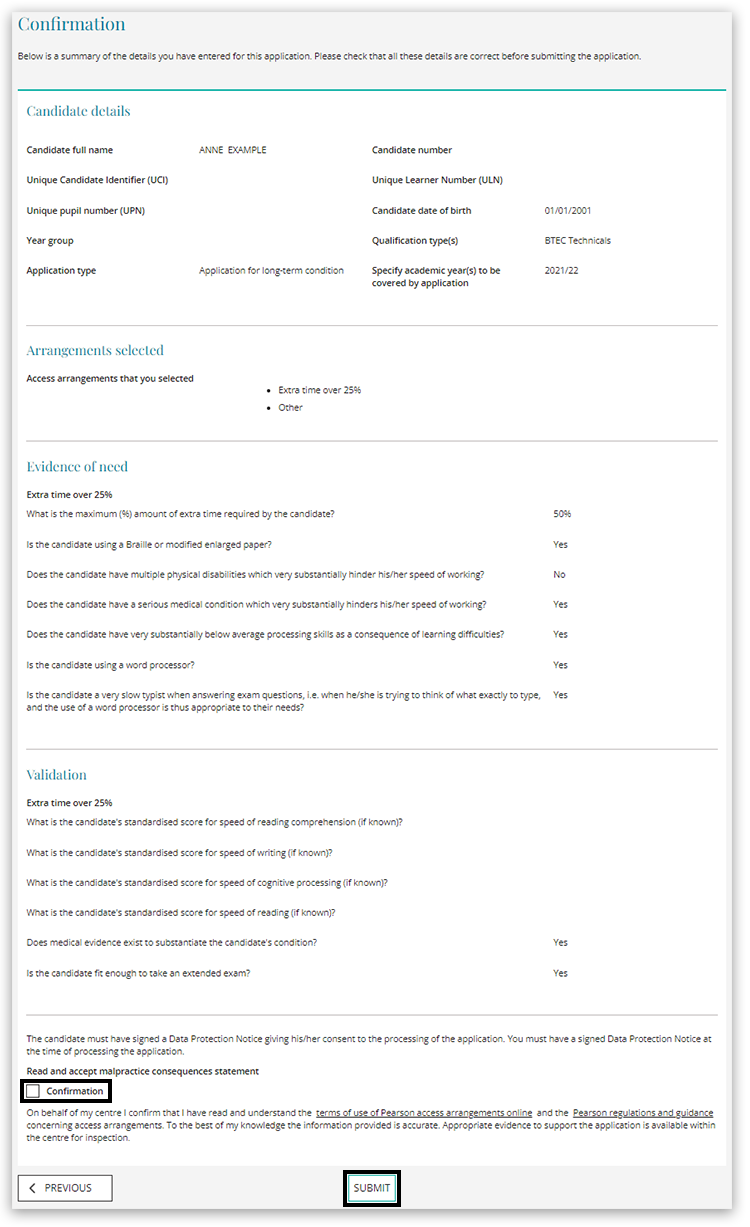
18. The next page will show the parts of the application you have created so far, enabling you to check that all the information is correct. If you find any errors, you can use the 'Previous' button in the bottom left corner to move back in the process.
Once you have checked all the information is correct, select 'Confirmation' and click 'Submit':
|
Submitting an application
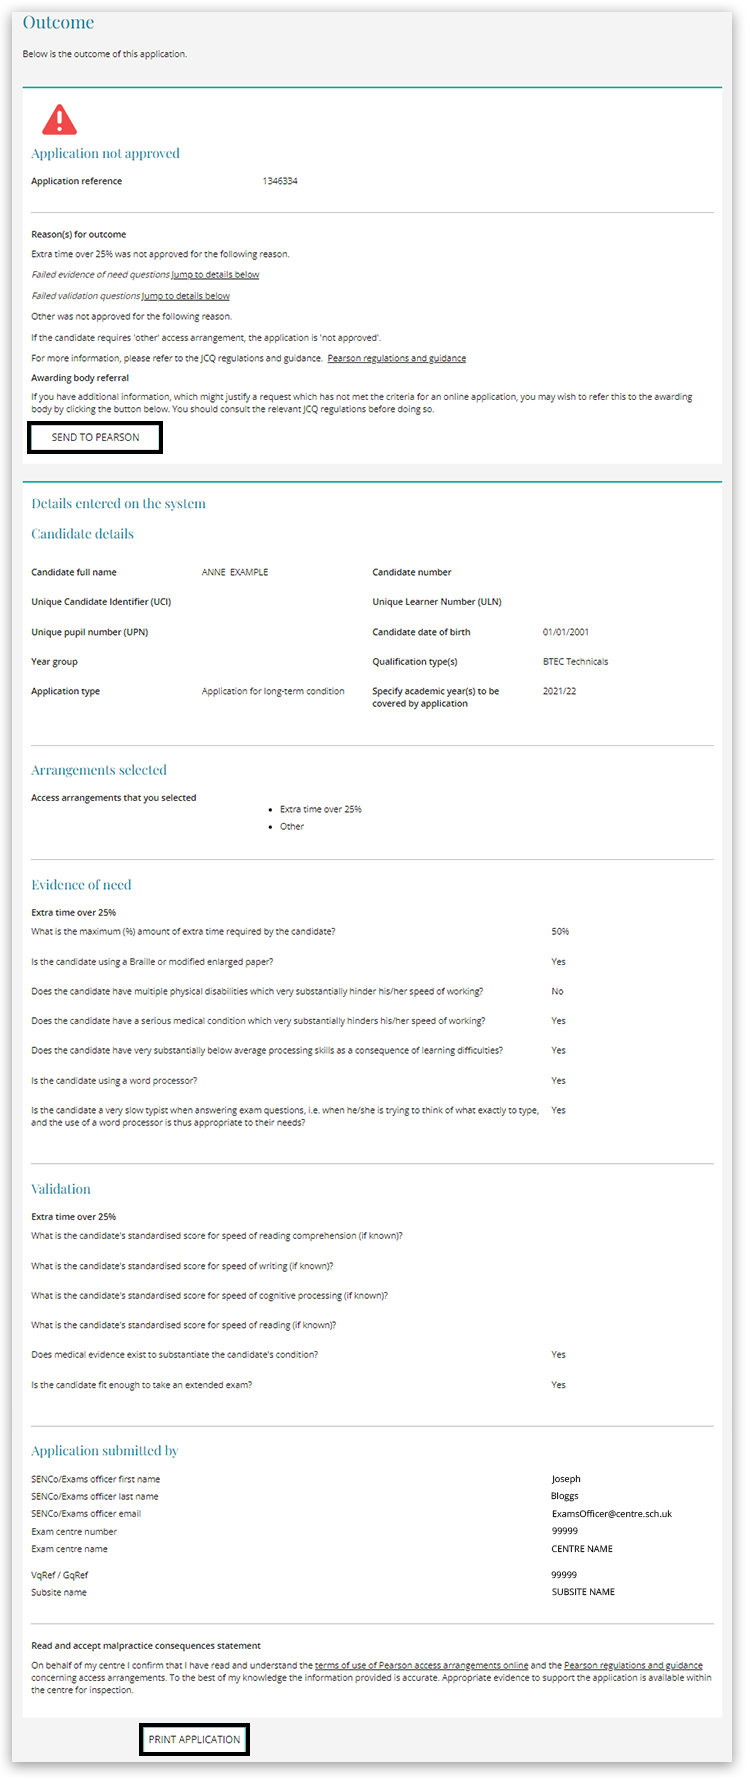
19. The application has created a unique reference number. Next, click the 'Print Application' button at the bottom of the page to print the created application if required. Then, click the button 'Send To Pearson' to proceed:
Please note: don't worry if your application is not approved at this stage, as you will be able to include additional evidence further on in the process.
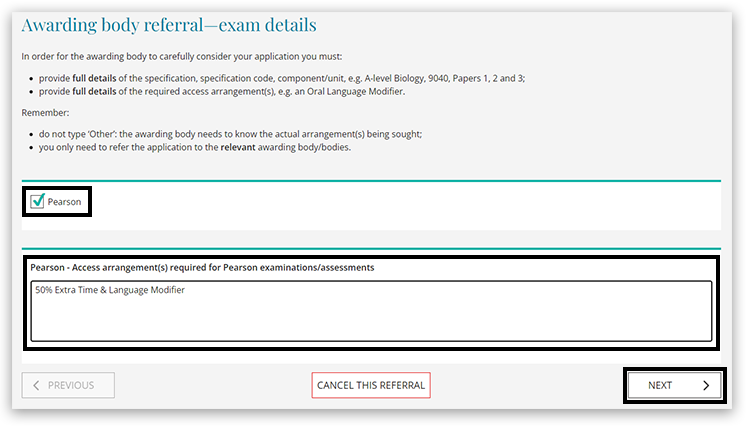
20. Select 'Pearson' and enter the Access Arrangement(s) required specifically if other was selected previously in 'Step 14'. Select 'Next' to proceed:
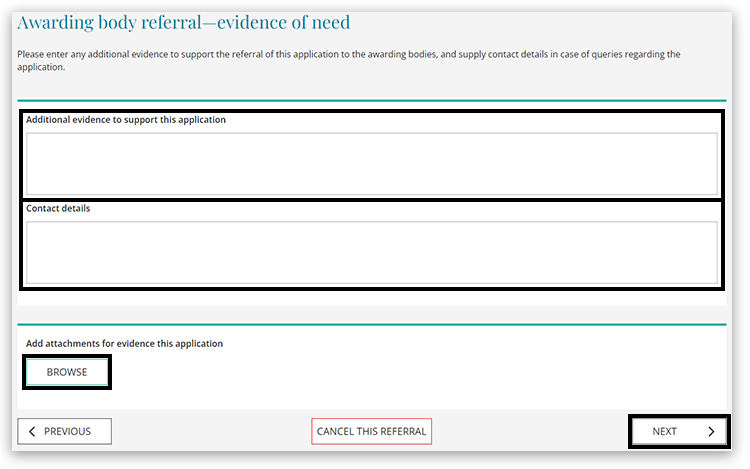
21. Enter additional evidence to support the application, contact details, the Form 8, Form 9 or Form 8RF and the reference number if created online. The 'Browse' button will enable you to attach any medical evidence documentation, EHCP (Education, Health & Care Plan) or other documents to support the application. Select 'Next' to proceed:
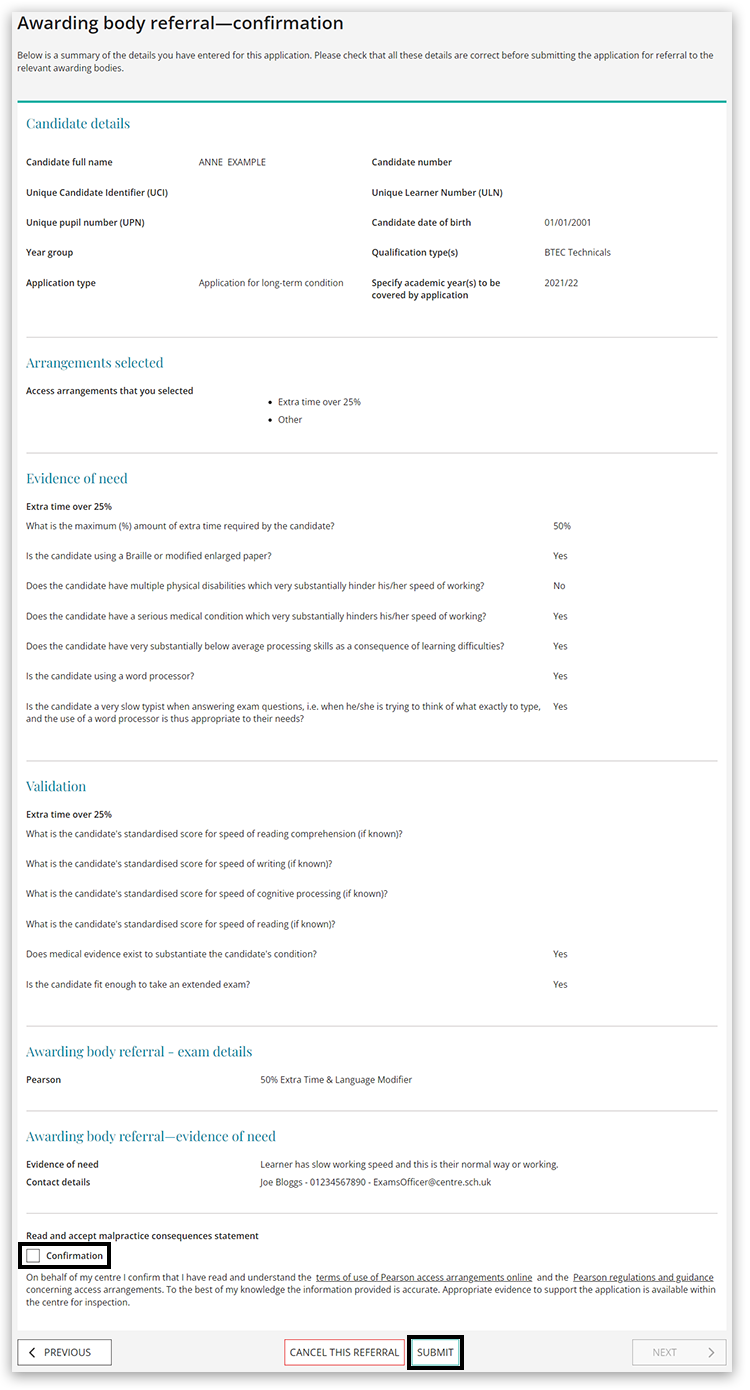
22. Review the information shown on the confirmation page, scroll to the bottom of the page, select 'Confirmation' and then click 'Submit':
23. The next page confirms confirmation of the reference number and that the application has been submitted to Pearson for processing. Finally, click 'Download Evidence Coversheet' to include with your evidence submission:

|
Related Article:
PAAO: Pearson Access Arrangements - Finding an Application / Viewing Outcomes
Back to Special Requirements: Access Arrangements & Special Considerations index page.


