|
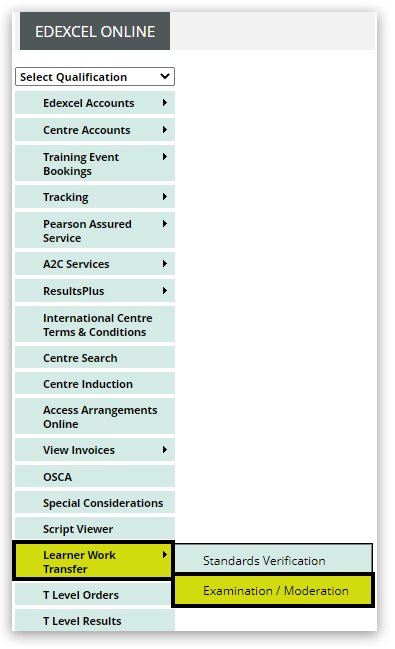
1. Log in to Edexcel Online and hover your mouse over 'Learner Work Transfer' and then click on 'Examination/Moderation' from the menu on the left side of the page:
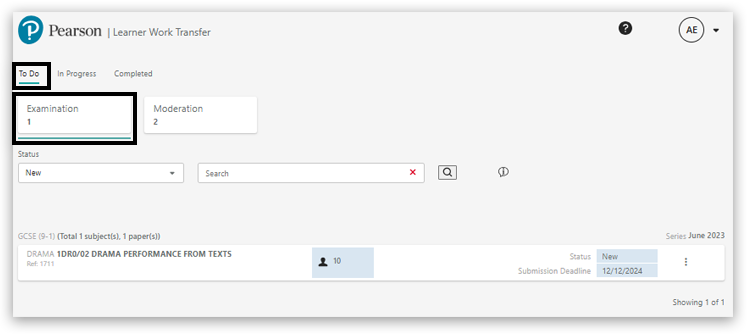
2. Click on the 'To Do' option, then select the 'Examination' tab (near the top of the page) to see Examination requests:
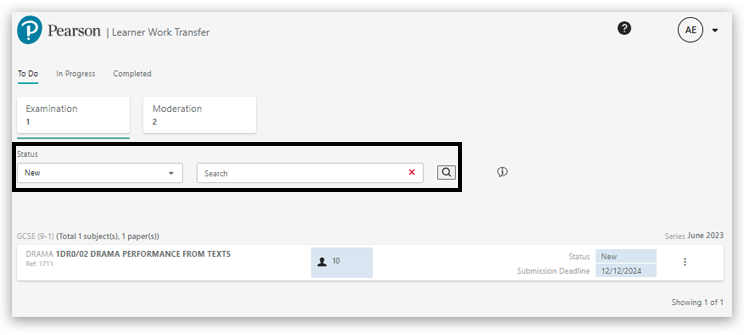
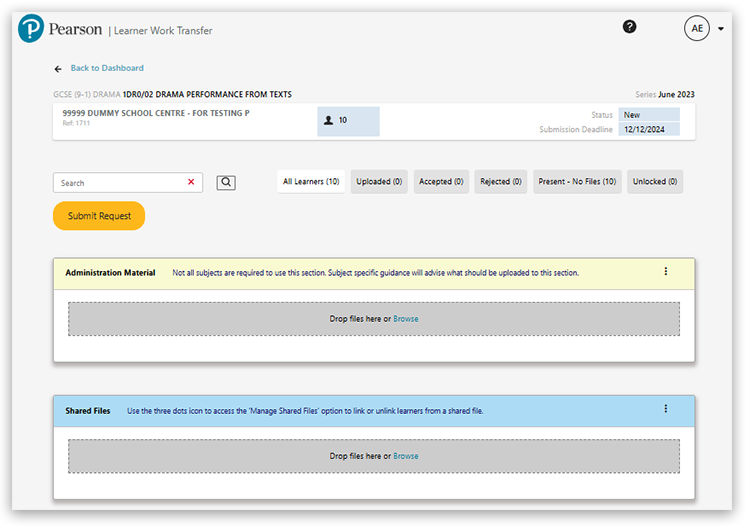
3. This is the Learner Work Transfer Examination dashboard. Using the search box, you can narrow down the requests as required. The search will work across all the data shown in the list of requests:
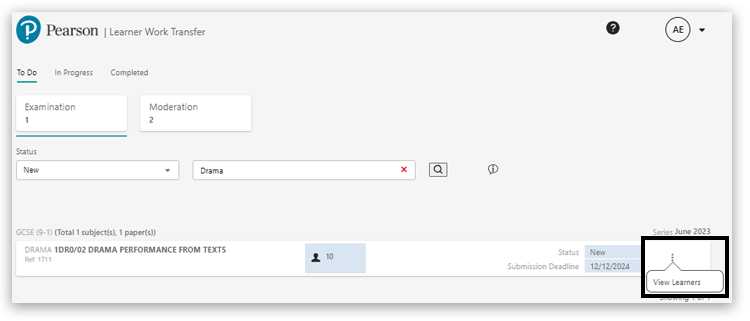
4. Click on the 3 vertical dots located on the right of the request, then select 'View Learners' to open the request:
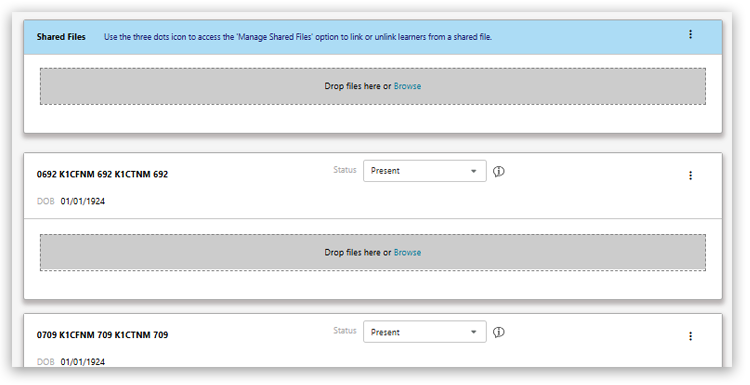
You will be presented with a list of all learners entered for the unit:
If you have additional learners who have not yet been entered, you should make these entries by following the usual process (please see: Entries: Making Entries (UK) or Entries: Making Entries (International) for additional guidance). The request should be updated within 5 working days.
If the request is in a Submitted state and you have started uploading evidence when new entries have been added, the request will show a status of 'In Progress (C)' to denote a change. Before submission, the request status will show 'In Progress':

5. To upload learner evidence for assessment, there are a couple of options to choose from. First, you can click on 'Browse' under a learner:
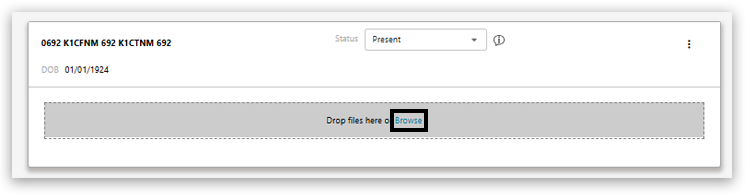
This will open the file explorer on the machine. You can select an individual file by clicking on it, or you can select multiple files for a given learner by pressing the 'Ctrl' key on your keyboard to select multiple files for a given learner, then clicking 'Open':

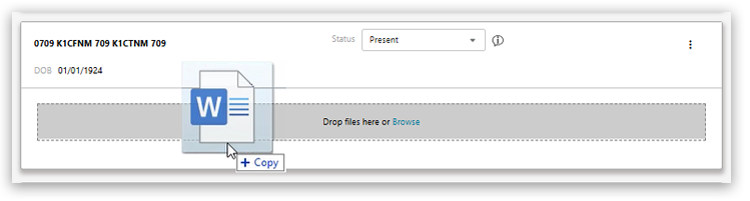
6. Alternatively, you can drag and drop files from your machine directly into the grey area of the page below the given learner:
Files uploaded will display the 'Uploaded' state:
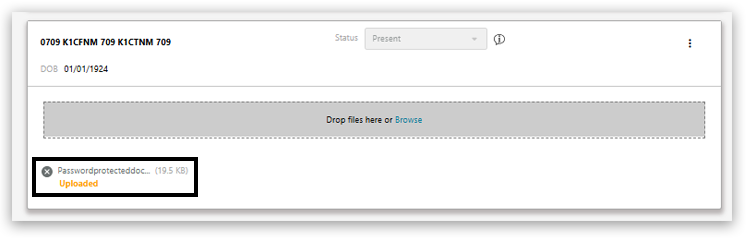
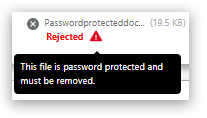
During the 'Upload' state, the files are virus checked. The system also checks that the files are not password protected and are in an accepted file format — please see: Learner Work Transfer (LWT): Supported File Formats for additional guidance.
You do not need to wait until these checks are completed to submit the request. However, if you need to exit the request at this point, these checks will continue in the background.
If you choose to submit the request before the file checks are complete, you should check back the following day to confirm whether the request has been successfully submitted or not.
If an issue were identified after the checks were completed, the request would show as 'Not Submitted' on the 'In Progress' tab of the Examination dashboard.
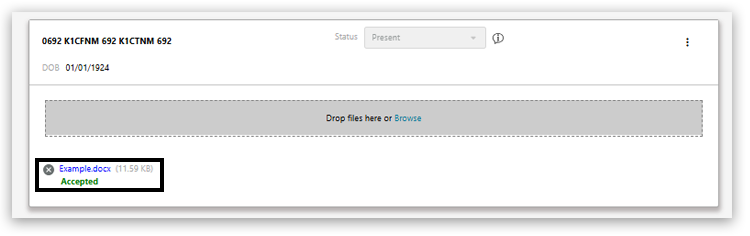
If the checks are successful, the status will show as 'Accepted':
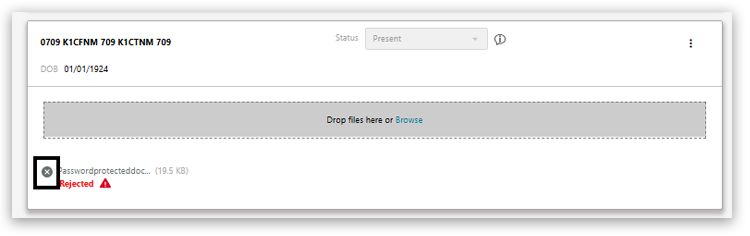
7. If the checks are unsuccessful, the status will show as 'Rejected'; you can hover over the warning icon to display the reason for rejection:
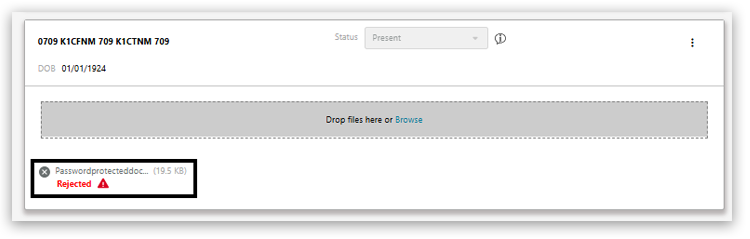
Click on the 'X' next to the filename to remove the rejected file:
You can continue uploading files to individual learners using the Browse or drag and drop options.
Please note: If you have incorrectly added a file to a learner, you can click on the 'X' next to the filename to remove the file.
|